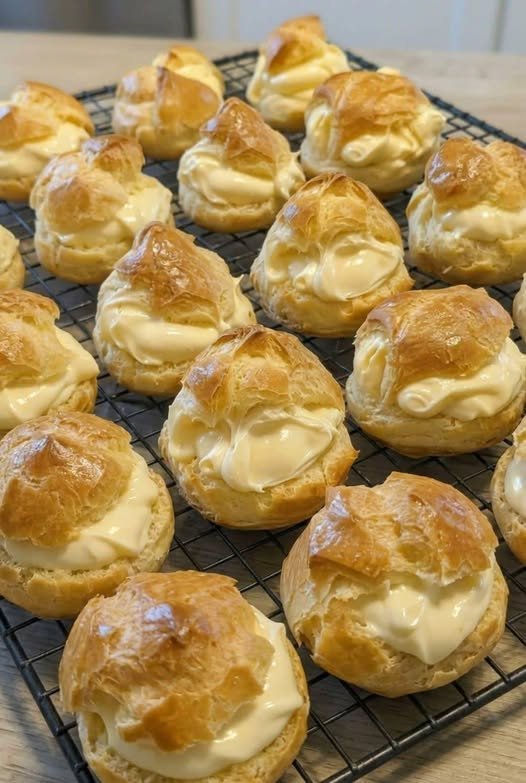

Ingredients
For the Pastry
- 2 cups gluten-free all-purpose flour blend
- 1/2 teaspoon xanthan gum, if your flour blend does not already contain it
- 1/2 teaspoon salt
- 1 tablespoon granulated sugar
- 3/4 cup cold unsalted butter
- 1/2 cup ice-cold water
- 1 teaspoon lemon juice or apple cider vinegar
For Brushing
- 1 egg
- 1 tablespoon water
Important Tips Before Starting
The most important thing when making puff pastry is keeping the butter cold. If the butter becomes too soft, it can blend into the dough instead of creating separate layers.
Use very cold water and work on a cool surface whenever possible.
Because gluten-free dough does not stretch in exactly the same way as regular wheat dough, handle it gently. If it cracks while rolling, simply press the edges back together.
Do not add too much extra flour during rolling. Excess flour can make the pastry dry and tough.
Step 1: Prepare the Flour Mixture
Place the gluten-free flour in a large mixing bowl.
Add the salt, sugar, and xanthan gum if your flour blend does not already contain it.
Whisk everything together until evenly combined.
The xanthan gum helps provide some flexibility and structure to the gluten-free dough.
Step 2: Add the Butter
Cut about 1/4 cup of the cold butter into small pieces.
Add these pieces to the flour mixture.
Using your fingertips or a pastry cutter, gently work the butter into the flour.
Do not completely blend the butter into the flour. A few small pieces of butter should remain visible.
These pieces will help create flaky layers.
Step 3: Add the Cold Water
Mix the ice-cold water with the lemon juice or apple cider vinegar.
Gradually add the liquid to the flour mixture.
Stir gently with a fork or spatula.
The dough should begin coming together.
If it seems very dry, add another teaspoon of cold water at a time.
Avoid adding too much water.
Step 4: Form the Dough
Transfer the mixture to a lightly floured work surface.
Gently press the dough together with your hands.
Do not knead it like bread dough.
Shape it into a rough rectangle.
Wrap it tightly in plastic wrap or place it in an airtight container.
Refrigerate the dough for about 30 minutes.
Step 5: Prepare the Butter Block
While the dough chills, take the remaining butter.
Place it between two sheets of parchment paper.
Using a rolling pin, gently pound and roll the butter into a flat rectangle.
Try to make the butter approximately the same shape as the dough.
The butter should remain cold but flexible.
If it becomes soft or greasy, place it in the refrigerator for several minutes.
Step 6: Roll the Dough
Remove the chilled dough from the refrigerator.
Place it on a lightly floured piece of parchment paper.
Roll it into a rectangle large enough to hold the butter.
Place the butter in the center.
Fold the dough over the butter so that the butter is completely enclosed.
Press the seams gently to seal them.
Step 7: First Fold
Turn the dough so that the longer side faces you.
Using a rolling pin, gently roll the dough into a long rectangle.
Roll from the center outward rather than pressing aggressively.
If the dough begins cracking, gently press it back together.
Once you have a long rectangle, fold the top third toward the center.
Then fold the bottom third over the top.
This is called a letter fold.
Wrap the dough and refrigerate it for about 20–30 minutes.
Step 8: Second Fold
Remove the dough from the refrigerator.
Turn it 90 degrees.
Roll it again into a long rectangle.
Perform another letter fold.
Wrap it and refrigerate again.
Keeping the dough cold between folds is very important.
Step 9: Third Fold
Repeat the same process one more time.
Roll the dough into a rectangle.
Fold it into thirds.
Refrigerate for another 20–30 minutes.
Three folds should give the pastry several delicate layers.
Step 10: Final Chilling
After completing the folds, wrap the dough tightly.
Place it in the refrigerator for at least 1 hour.
For better results, you can refrigerate it overnight.
The longer resting period allows the butter to become firm again and makes the dough easier to handle.
Step 11: Roll for Baking
When you’re ready to use the pastry, place it on parchment paper.
Roll it gently to your desired thickness.
For most pastries, approximately 1/8 inch thickness works well.
Try not to roll backward and forward too aggressively because this can flatten the layers.
Step 12: Cut the Pastry
Use a sharp knife or pastry cutter to cut the dough.
You can make:
- Squares
- Rectangles
- Circles
- Strips
- Triangles
For turnovers, cut the pastry into squares.
For cheese twists, cut it into long strips.
For fruit pastries, rectangles or squares work beautifully.
Step 13: Add Your Filling
Place your chosen filling in the center.
Do not overfill the pastry.
Too much filling can cause the pastry to open while baking.
For sweet pastries, you can use:
- Apple and cinnamon
- Blueberries
- Strawberries
- Cherries
- Chocolate
- Lemon curd
- Cream cheese
For savory pastries, try:
- Cheese
- Spinach and cheese
- Chicken
- Mushrooms
- Cooked vegetables
Make sure wet fillings are not excessively liquid.
Step 14: Seal the Pastry
Brush the edges lightly with water.
Fold the pastry over the filling.
Press the edges together gently.
You can use a fork to create a decorative sealed edge.
If the pastry feels soft, place the prepared pastries in the refrigerator for 10–15 minutes before baking.
Step 15: Prepare the Egg Wash
Crack one egg into a small bowl.
Add one tablespoon of water.
Whisk until smooth.
Brush a thin layer over the surface of the pastry.
Try not to let too much egg wash drip down the sides because it can interfere with the pastry layers rising.
Step 16: Bake
Preheat your oven to 400°F (200°C).
Place the pastries on a parchment-lined baking tray.
Bake for approximately 20–30 minutes, depending on their size.
The pastry should become puffed and golden brown.
Do not open the oven repeatedly during baking.
The heat and steam from the butter help create the flaky texture.
Step 17: Cool
Remove the pastries from the oven.
Allow them to cool on the baking tray for several minutes.
Then transfer them to a wire rack.
The pastry will become crisper as it cools.
How to Get Flaky Gluten-Free Puff Pastry
There are several important tricks that make a big difference.
Keep Everything Cold
Cold butter is essential.
If the butter melts before baking, the layers can disappear.
If you notice the dough becoming soft while rolling, stop and refrigerate it.
Don’t Overwork the Dough
Gluten-free pastry does not need kneading.
Simply bring the ingredients together and roll and fold them gently.
Use Parchment Paper
Parchment makes gluten-free dough much easier to roll and move.
It also prevents sticking.
Don’t Rush the Chilling
Chilling between folds might seem like an unnecessary step, but it helps maintain the layers.
Use a Good Gluten-Free Flour Blend
A gluten-free flour blend designed for baking generally gives better results than using one single flour.
Rice flour, tapioca starch, potato starch, and other gluten-free starches are commonly used in blends.
Always check the package if you need the recipe to be strictly gluten-free, particularly when avoiding cross-contact.
How to Store Gluten-Free Puff Pastry
Unbaked pastry dough can be kept refrigerated for about 2–3 days when tightly wrapped.
You can also freeze the dough.
Wrap it securely and place it inside a freezer-safe bag or container.
It can generally be frozen for several weeks.
When ready to use it, thaw it in the refrigerator rather than leaving it at room temperature for a long time.
Can You Freeze Prepared Pastries?
Yes.
Shape your pastries before baking and place them on a parchment-lined tray.
Freeze until firm.
Then transfer them to a freezer-safe container.
You can bake them from frozen, although they may need several extra minutes in the oven.
This is particularly convenient when preparing breakfast pastries or party appetizers ahead of time.
Ways to Use Gluten-Free Puff Pastry
This pastry is incredibly versatile.
Apple Turnovers
Fill pastry squares with diced apples, cinnamon, and a little sugar.
Fold into triangles and bake until golden.
Chocolate Pastries
Place a small piece of chocolate in the center of a pastry rectangle.
Fold, seal, and bake until beautifully puffed.
Cheese Twists
Cut pastry into strips.
Sprinkle with grated cheese.
Twist gently and bake until crisp.
Spinach and Cheese Pastries
Combine cooked spinach with cheese and seasonings.
Place a small amount inside pastry squares and bake until golden.
Fruit Pastries
Fresh or cooked fruit can be placed in the center of pastry squares.
A little cream cheese underneath the fruit creates an especially creamy filling.
Troubleshooting
The Pastry Didn’t Puff
The most common reason is that the butter became too warm.
Make sure the dough is chilled before baking.
Also ensure your oven is fully preheated.
The Butter Leaked Out
Some butter leakage can happen naturally, but excessive leakage usually means the butter became too soft or the layers were not sealed properly.
Chill the shaped pastry before baking.
The Dough Cracks
Gluten-free pastry can be more fragile than regular puff pastry.
If it cracks, gently press the crack together.
Avoid forcing the dough into a large shape.
The Pastry Is Dry
Too much flour or too little liquid can cause dryness.
Measure the flour carefully and add water gradually until the dough holds together.
The Pastry Is Not Crisp
Make sure the pastry is baked until properly golden rather than removing it too early.
Allow it to cool on a wire rack so steam does not make the bottom soggy.
Final Thoughts
Homemade gluten-free puff pastry takes a little patience, but the result is worth the effort. The key is simple: cold butter, gentle handling, careful folds, and plenty of chilling time.
Once you master the basic dough, you can use it for everything from flaky fruit turnovers and chocolate pastries to savory cheese twists and vegetable appetizers. Making it yourself also allows you to control the ingredients and customize the pastry for both sweet and savory recipes.
For the flakiest results, keep the pastry cold right up until it goes into a fully preheated oven. With a little practice, this gluten-free version can become a reliable homemade staple for your baking