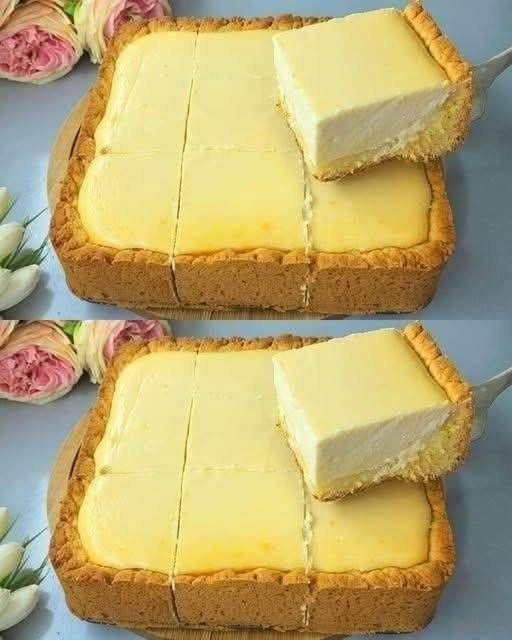

Ingredients
The ingredients below are suitable for one 9-inch (23 cm) tart pan with a removable base.
1. For the shortcrust pastry
- 300 g all-purpose flour
- 150 g cold unsalted butter, cut into cubes
- 120 g granulated sugar
- 1 large egg
- 1 large egg yolk
- 1 teaspoon vanilla extract
- Finely grated zest of 1 lemon
- 1 pinch of salt
- 1–2 tablespoons cold water, if needed
The pastry should be tender and buttery rather than elastic. Cold butter helps create a delicate, crumbly texture, while lemon zest adds a gentle fragrance that complements the custard.
2. For the Italian custard filling
- 500 ml whole milk
- 4 large egg yolks
- 120 g granulated sugar
- 40 g cornstarch
- 1 teaspoon vanilla extract or the seeds of 1 vanilla bean
- Finely grated zest of half a lemon
- 20 g unsalted butter, optional
Whole milk produces a rich custard, while cornstarch helps it set firmly enough to slice after baking and cooling.
3. For the topping
- 40–50 g pine nuts
- 1–2 tablespoons powdered sugar, for dusting
- A little extra butter and flour for preparing the tart pan, if necessary
Pine nuts are the traditional topping. Their delicate, buttery flavor becomes more pronounced as they toast in the oven.
Instructions
Step 1: Prepare the pastry dough
In a large mixing bowl, combine the flour, sugar, lemon zest, and salt. Add the cold butter cubes and rub them into the flour with your fingertips until the mixture resembles coarse breadcrumbs.
Add the egg, egg yolk, and vanilla extract. Mix gently until the ingredients begin to form a dough. If the mixture seems too dry, add cold water one teaspoon at a time.
Bring the dough together without kneading it excessively. Overworking the dough can develop gluten, resulting in a tough pastry instead of a tender crust.
Flatten the dough into a disc, wrap it in cling film, and refrigerate for at least 30–60 minutes. Chilling allows the butter to firm up and makes the pastry easier to roll.
Step 2: Make the vanilla custard
Pour the milk into a medium saucepan. Add the lemon zest and heat over medium-low heat until the milk is steaming, but do not let it boil vigorously.
Meanwhile, whisk the egg yolks and sugar in a separate bowl until the mixture becomes pale and smooth. Add the cornstarch and whisk until no lumps remain.
Gradually pour a small amount of the warm milk into the egg mixture while whisking continuously. This process gently raises the temperature of the eggs and reduces the risk of scrambling them.
Slowly whisk in the remaining milk. Return the mixture to the saucepan and cook over medium-low heat, stirring constantly with a whisk.
After several minutes, the custard will begin to thicken. Continue cooking for another minute or two, ensuring that it reaches a gentle bubble and thickens thoroughly. Remove it from the heat and stir in the vanilla extract and optional butter.
Transfer the custard to a clean bowl. Press cling film directly against its surface to prevent a skin from forming. Allow it to cool, then refrigerate until cold.
Important: The custard should be thick enough to hold its shape on a spoon. A thin filling can make the pastry soggy and cause the tart to collapse when sliced.
Step 3: Roll out the pastry
Preheat the oven to 180°C (350°F), using conventional top-and-bottom heat.
Remove the chilled pastry from the refrigerator and divide it into two portions, with approximately two-thirds for the base and one-third for the top.
Lightly flour your work surface and rolling pin. Roll the larger portion into a circle about 3–4 mm thick, making it wide enough to cover the base and sides of your tart pan.
Carefully transfer the pastry to the pan. Press it gently into the base and corners, leaving a little excess pastry above the rim. Trim any particularly uneven edges.
If the dough becomes too soft or sticky while rolling, refrigerate it for 10 minutes before continuing.
Step 4: Fill the tart
Remove the chilled custard from the refrigerator and whisk it briefly until smooth. Spoon it into the pastry shell and spread it evenly with a spatula.
Avoid filling the shell right to the very top, as a small amount of space helps prevent overflow during baking.
Roll out the remaining pastry into a circle large enough to cover the filling. Place it gently over the custard and press the edges together with the bottom crust to seal the tart.
Trim away excess pastry and gently smooth the edges. If the top cracks slightly, press the pastry together with your fingertips.
Alternatively, traditional home-style versions may use a more rustic top crust, so perfect decoration is not necessary.
Step 5: Add the pine nuts
Scatter the pine nuts evenly across the top of the pastry. Press them very lightly into the surface so they stay in place during baking.
For an especially attractive finish, distribute them in a fairly even layer, leaving small gaps between the nuts. They will toast and develop a golden color as the tart bakes.
You do not need to add powdered sugar before baking. Adding it afterward preserves its delicate white appearance.
Step 6: Bake the tart
Place the tart on the middle rack of the preheated oven. Bake for approximately 40–50 minutes, or until the pastry is golden brown and the pine nuts are lightly toasted.
The precise baking time depends on your oven and the thickness of the pastry. Begin checking after 35–40 minutes.
If the pine nuts start browning too quickly, loosely cover the tart with a piece of aluminum foil for the remaining baking time.
The pastry should look dry and golden rather than pale or doughy. The custard may still have a slight wobble when hot, but it should not look liquid.
Remove the tart from the oven and place it on a wire rack. Let it cool completely in its pan before attempting to remove it.
Step 7: Cool and decorate
Once the tart has cooled to room temperature, carefully remove the sides of the tart pan.
Refrigerate it for at least 2 hours before slicing. For the cleanest slices and best custard texture, chilling for 3–4 hours is even better.
Just before serving, dust the top lightly with powdered sugar using a fine sieve. The contrast between the white sugar, golden pastry, and toasted pine nuts gives Torta della Nonna its classic appearance.
Use a sharp knife to cut the tart into 8–10 slices, wiping the blade between cuts if necessary.
Tips for the perfect Torta della Nonna
- Keep the butter cold. This helps produce a delicate, crumbly pastry that holds its shape.
- Cool the custard properly. Warm custard can soften the pastry before baking and make assembly difficult.
- Avoid excessive kneading. Mix the pastry only until it comes together.
- Use good-quality vanilla. Real vanilla extract or vanilla bean gives the custard a deep, rounded aroma.
- Watch the pine nuts. They can burn quickly, so check the tart during the final stages of baking.
- Allow enough chilling time. The custard becomes firmer and easier to cut as the tart cools.
Serving suggestions
Torta della Nonna is delicious on its own, but a few simple accompaniments can make it even more special.
- Espresso or cappuccino: The slight bitterness of coffee balances the sweetness of the custard.
- Fresh berries: Strawberries, raspberries, or blueberries add freshness and color.
- Vanilla ice cream: A small scoop creates a lovely contrast between cold ice cream and buttery pastry.
- Fresh mint: A few leaves can add a subtle decorative touch when serving guests.
For a traditional Italian-style presentation, serve a modest slice with espresso after lunch or dinner.
Storage and make-ahead instructions
Store the tart in an airtight container in the refrigerator for up to 3 days because the filling contains milk and eggs. For the best flavor and texture, let individual slices stand at room temperature for about 10–15 minutes before serving.
You can prepare the pastry dough a day in advance and keep it refrigerated. The custard can also be made a day ahead and stored with cling film pressed directly against its surface.
Freezing the fully assembled tart is not ideal because the custard may become grainy or release moisture after thawing.
Final thoughts
Torta della Nonna is a wonderful example of traditional Italian baking: simple ingredients transformed into a dessert that feels both comforting and elegant. The buttery lemon-scented pastry, smooth vanilla custard, toasted pine nuts, and final dusting of powdered sugar create a balanced combination of flavors and textures.
Although the recipe involves several steps, each one is straightforward when given enough time. Prepare the custard carefully, handle the pastry gently, and allow the finished tart to cool completely before serving.
The result is a beautiful Italian dessert that is equally suitable for a family meal or a special occasion—and one that tastes even better when shared with the people you love.