
Ingredients
- 100 g active sourdough starter, bubbly and recently fed
- 350 g lukewarm water
- 500 g bread flour
- 10 g fine sea salt
- 1 tablespoon fresh rosemary, finely chopped
- 1 whole head garlic
- 1 teaspoon olive oil, plus extra for roasting the garlic
- 1 teaspoon honey or maple syrup, optional
Prepare the Roasted Garlic
Start by roasting the garlic because it needs time to cool.
Preheat your oven to 200°C (400°F). Slice the top from the head of garlic to expose the cloves. Place it on a small piece of foil, drizzle with about 1 teaspoon olive oil, and wrap it loosely.
Roast for 35–45 minutes, or until the cloves are golden, soft, and easily squeezed from their skins. Allow the garlic to cool completely. Once cool enough to handle, squeeze the soft cloves into a small bowl and gently mash them with a fork.
Roasted garlic gives this bread a mellow, slightly sweet flavor. If you prefer a sharper garlic taste, you can substitute 2–3 finely minced fresh garlic cloves, although roasted garlic is particularly delicious in sourdough.
Mix the Dough
In a large mixing bowl, combine the 500 g flour and 350 g water. Mix with a wooden spoon or your hands until there are no obvious dry patches of flour.
Cover the bowl and let the mixture rest for 30–45 minutes. This short rest, known as an autolyse, gives the flour time to absorb the water and helps develop gluten naturally without kneading.
Add the 100 g active sourdough starter, 10 g salt, and optional honey or maple syrup. Mix thoroughly using your hands or a dough whisk.
The dough will be sticky and somewhat shaggy. Don’t be tempted to add lots of extra flour. A wetter dough is part of what gives rustic sourdough its beautiful open crumb and chewy texture.
Add Rosemary and Garlic
Once the dough is mixed, spread it gently in the bowl. Add the cooled roasted garlic and chopped rosemary.
Fold the dough over itself several times to distribute the ingredients. Try not to crush the garlic completely into the dough; small pockets of roasted garlic throughout the loaf are wonderfully flavorful.
Drizzle in 1 teaspoon olive oil and give the dough a final gentle fold.
Stretch and Fold
Cover the bowl and let the dough rest for about 30 minutes.
Instead of kneading, you’ll develop strength through a series of stretch-and-folds.
With slightly wet hands, grab one side of the dough, stretch it upward without tearing, and fold it over the center. Rotate the bowl and repeat on all four sides.
Cover and rest for another 30 minutes.
Repeat this process 3–4 times, spacing each set about 30 minutes apart. As the dough develops strength, you’ll notice that it becomes smoother, more elastic, and easier to handle.
After the final fold, cover the bowl and leave the dough undisturbed for bulk fermentation.
Bulk Fermentation
Let the dough ferment at room temperature until it looks noticeably puffier and has increased in volume by roughly 50–75%.
Depending on the strength of your starter and the temperature of your kitchen, this can take approximately 4–8 hours. Don’t rely solely on the clock. Watch the dough.
A properly fermented dough should have visible bubbles around the edges, a slightly domed surface, and a soft, airy feel. If you shake the bowl gently, the dough should jiggle.
Avoid waiting for the dough to double completely, especially if your kitchen is warm. Over-fermentation can make the dough difficult to shape and result in a flatter loaf.
Shape the Loaf
Lightly flour your work surface and gently turn the dough out onto it.
Try to preserve as much of the air as possible. Don’t aggressively punch it down.
Shape the dough into a round by folding the edges toward the center. Turn it over so the seam is underneath, then use your hands to gently drag the dough toward you across the counter. Rotate and repeat until you have a smooth, taut surface.
Place the shaped dough seam-side up into a well-floured banneton or a bowl lined with a heavily floured kitchen towel.
Cover it with a clean towel or reusable cover.
Cold Proof
For the best flavor, refrigerate the shaped dough for 8–16 hours.
The long, cold fermentation allows the sourdough to develop a deeper, more complex flavor while also making the dough easier to score.
You can bake the bread directly from the refrigerator, so there’s no need to bring it back to room temperature.
Bake the Bread
Place a Dutch oven with its lid inside your oven and preheat to 245°C (475°F) for at least 30–45 minutes.
When you’re ready to bake, carefully turn the cold dough onto a piece of parchment paper.
Dust the top lightly with flour if desired. Using a sharp bread lame or razor blade, make one deep slash across the top. You can also create a decorative pattern with several shallow cuts.
Carefully transfer the dough into the hot Dutch oven.
Cover with the lid and bake for 20 minutes at 245°C (475°F).
Remove the lid, reduce the temperature to 220°C (425°F), and bake for another 20–25 minutes, or until the loaf is a deep golden brown.
For an especially crisp crust, leave the bread in the switched-off oven with the door slightly open for another 5–10 minutes.
Cool Before Slicing
This may be the hardest part: let the bread cool completely before cutting it.
Place the loaf on a wire rack and allow it to cool for at least 1 hour, preferably closer to 2 hours.
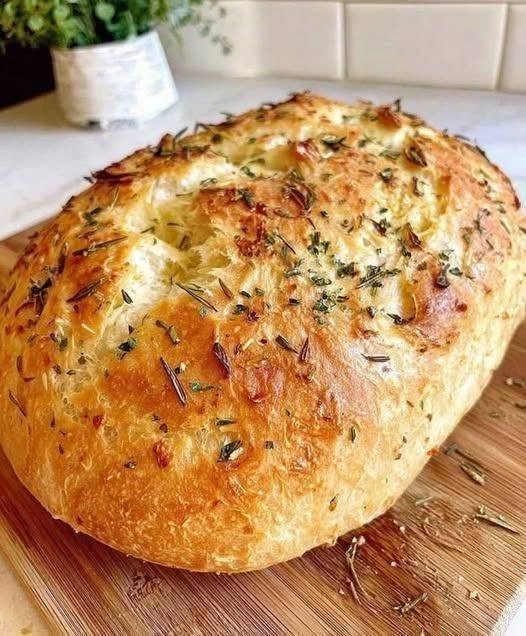
Cutting into hot sourdough too early can compress the crumb and make it appear gummy. Once cooled, you’ll get a wonderfully chewy interior with crisp crust, fragrant rosemary, and little pockets of sweet roasted garlic.
Tips for Perfect Rosemary Garlic Sourdough
Use active starter. Your starter should be bubbly, risen, and capable of doubling in size after feeding. A weak starter can lead to a dense loaf.
Don’t overload the dough. Too much garlic or rosemary can interfere with the dough structure. The quantities above provide plenty of flavor without overwhelming the bread.
Watch fermentation, not the clock. Temperature has a huge effect on sourdough. A warm kitchen may require significantly less fermentation time than a cool one.
Keep the crust crisp. Store the cooled loaf loosely wrapped in a clean kitchen towel or in a bread bag. Avoid sealing it in plastic while the crust is still crisp, as trapped moisture will soften it.
For extra flavor, sprinkle a little flaky sea salt over the dough immediately before baking.
This rustic loaf is wonderful served warm with salted butter, alongside soup, or used for sandwiches. The combination of tangy sourdough, aromatic rosemary, sweet roasted garlic, and a crackling crust makes it a simple bread that tastes remarkably special.