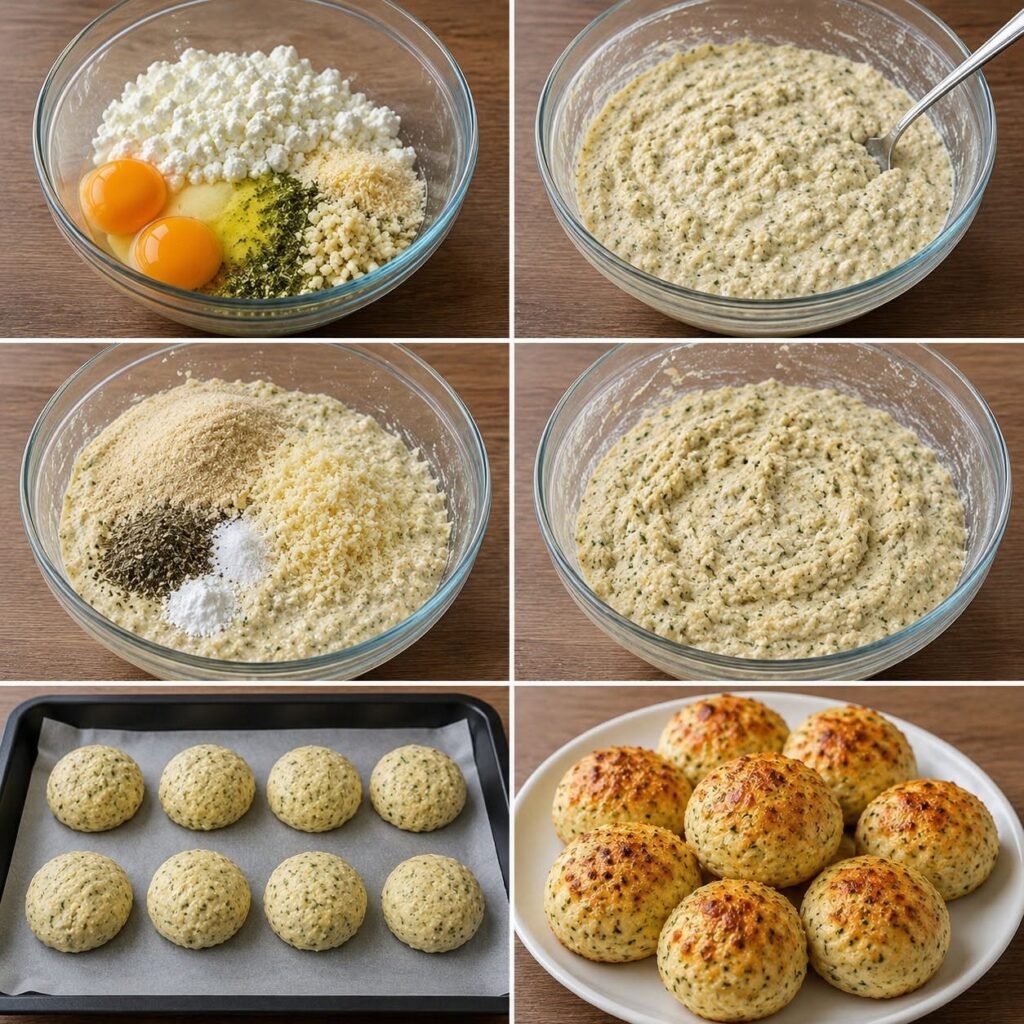

Ingredients
For the cottage cheese dough
- 1 cup (225 g) cottage cheese, preferably small-curd
- 3 cups (360–390 g) all-purpose flour, plus a little extra if needed
- 2¼ teaspoons (7 g) instant yeast
- 2 tablespoons granulated sugar
- 1 large egg, at room temperature
- ¼ cup (60 ml) warm milk
- 3 tablespoons (42 g) unsalted butter, softened
- 1 teaspoon salt
For the garlic butter topping
- 4 tablespoons (56 g) unsalted butter, melted
- 4 cloves garlic, finely minced or grated
- 1 tablespoon fresh parsley, finely chopped
- ¼ teaspoon salt, or to taste
- 2 tablespoons grated Parmesan cheese, optional
Optional finishing ingredients
- 2 tablespoons shredded mozzarella for a cheesy topping
- A pinch of black pepper
- Extra chopped parsley for garnish
Instructions
Step 1: Prepare the cottage cheese mixture
Add the cottage cheese to a blender or food processor and blend until mostly smooth. This step helps distribute the cheese evenly throughout the dough and gives the finished rolls a softer texture.
Transfer it to a mixing bowl. Add the warm milk, egg, sugar, and softened butter. Stir until combined. The milk should feel comfortably warm rather than hot, as excessive heat can damage the yeast.
Step 2: Mix the dough
In a separate bowl, combine 3 cups of flour, instant yeast, and salt. Gradually add the dry ingredients to the cottage cheese mixture, stirring until a soft, slightly sticky dough forms.
If the dough is extremely wet and difficult to handle, add extra flour one tablespoon at a time. Avoid adding too much because a softer dough generally produces lighter, fluffier rolls.
Step 3: Knead until smooth
Knead the dough by hand for 8–10 minutes, or use a stand mixer fitted with a dough hook for approximately 5–7 minutes on low to medium-low speed.
The dough should become elastic, smooth, and slightly tacky. If it sticks to your hands, lightly grease your hands instead of immediately adding more flour. Proper kneading helps develop the gluten that gives the rolls their beautiful, pillowy structure.
Step 4: Let the dough rise
Lightly grease a clean bowl and place the dough inside. Cover with a damp kitchen towel or plastic wrap. Leave it in a warm, draft-free place for 60–90 minutes, or until approximately doubled in size.
Rising time depends on room temperature, so look at the dough rather than relying only on the clock. A comfortably warm environment encourages the yeast to work efficiently.
Step 5: Shape the rolls
Gently press down the risen dough to release excess air. Transfer it to a lightly floured surface and divide it into 12 equal portions.
Shape each portion into a smooth ball by folding the edges underneath and gently rolling it against the counter. Arrange the balls in a lightly greased 9-by-13-inch baking dish, leaving a little space between them for expansion.
Cover and let the rolls rise again for 25–35 minutes, until noticeably puffy.
Step 6: Make the garlic butter
While the rolls rise, combine the melted butter, minced garlic, chopped parsley, and salt in a small bowl.
For a milder garlic flavor, briefly warm the garlic in the butter over low heat, then let the mixture cool slightly. Do not brown the garlic, as it can become bitter. Reserve a little garlic butter for brushing the rolls after baking.
Step 7: Bake until golden
Preheat your oven to 350°F (175°C). Lightly brush the risen rolls with some garlic butter, keeping a little for the final topping.
Bake for 18–23 minutes, until the tops are golden brown and the centers are cooked through. If you prefer a softer crust, avoid baking them until deeply browned. Baking times vary depending on your oven and the size of the rolls.
Step 8: Brush, rest, and serve
Remove the rolls from the oven and immediately brush the tops with the remaining garlic butter. Sprinkle with Parmesan or mozzarella, if desired, and finish with extra parsley.
Let the rolls rest for 5–10 minutes before serving. This allows the crumb to settle while the butter melts into the warm surface. Pull the rolls apart and enjoy them while they’re fresh and soft.
Tips for the softest, fluffiest rolls
- Blend the cottage cheese: Smooth cottage cheese creates a more even dough texture. If you don’t have a blender, mash it thoroughly with a fork.
- Measure flour carefully: Too much flour is one of the most common reasons homemade rolls turn out dense. Weighing the flour gives the most consistent results.
- Use room-temperature ingredients: The egg and cottage cheese should not be refrigerator-cold, as very cold ingredients can slow down rising.
- Don’t rush the second rise: The shaped rolls should look puffy before baking. This helps produce a lighter interior.
- Add garlic butter twice: A light coating before baking adds flavor, while a final coating after baking creates a rich, glossy finish.
- Keep the rolls covered after baking: Loosely cover them with a clean kitchen towel for a few minutes to help retain moisture.
Delicious variations
Cheesy garlic rolls
Add shredded mozzarella inside each dough ball or sprinkle it over the rolls during the final few minutes of baking.
Herb and garlic rolls
Mix parsley with finely chopped rosemary, thyme, or chives for a fragrant, savory variation.
Parmesan butter rolls
Add finely grated Parmesan to the garlic butter and sprinkle a little more on top before serving.
Serving suggestions
These cottage cheese garlic rolls are delicious served warm alongside creamy tomato soup, roasted vegetables, grilled chicken, pasta, or a fresh garden salad. They also make a wonderful addition to a holiday dinner table or a weekend family meal.
For a simple snack, split a roll open and add a little extra garlic butter. You can also use leftover rolls to make small sandwiches with cheese, chicken, or roasted vegetables.
Storage and reheating
Store completely cooled rolls in an airtight container at room temperature for up to 2 days, or refrigerate them for up to 4 days. Because this recipe contains cottage cheese, refrigerating leftovers is a sensible choice in a warm kitchen.
To reheat, wrap the rolls loosely in foil and warm them in a 300°F (150°C) oven for about 8–10 minutes. For a quicker option, microwave an individual roll for 10–15 seconds, checking that it doesn’t become chewy. Freeze the cooled rolls in a sealed freezer-safe bag for up to 2 months and thaw before reheating.
Frequently asked questions
Can I use cottage cheese straight from the refrigerator?
Yes, but allowing it to approach room temperature helps the dough rise more evenly. Avoid using hot cottage cheese.
Can I make these rolls without eggs?
Yes. You can try replacing the egg with approximately 60 g of plain yogurt, though the dough may have a slightly different texture and may need a small flour adjustment.
Why are my rolls dense?
Common causes include adding too much flour, insufficient kneading, under-proofing, or using inactive yeast. Make sure the dough becomes elastic and give it enough time to rise.
Can I prepare the dough ahead of time?
Yes. After kneading, cover the dough and refrigerate it overnight. The next day, let it sit until easier to handle, shape the rolls, and allow them to become puffy before baking. Cold dough may need additional rising time.
Can I use dried parsley?
Absolutely. Use about 1 teaspoon of dried parsley instead of 1 tablespoon of fresh parsley. Fresh parsley, however, gives the garlic butter a brighter color and flavor.
Final thoughts
These fluffy cottage cheese garlic rolls combine the comfort of homemade bread with the irresistible flavor of garlic butter. Their tender centers, golden tops, and rich savory aroma make them a recipe worth repeating. The cottage cheese adds moisture, while careful kneading and two rises create the soft, airy texture everyone loves.
Serve them straight from the oven, brush them generously with garlic butter, and enjoy every warm, buttery bite. Once you master this simple recipe, you can easily customize it with cheese, herbs, or your favorite seasonings to create your own signature garlic rolls.