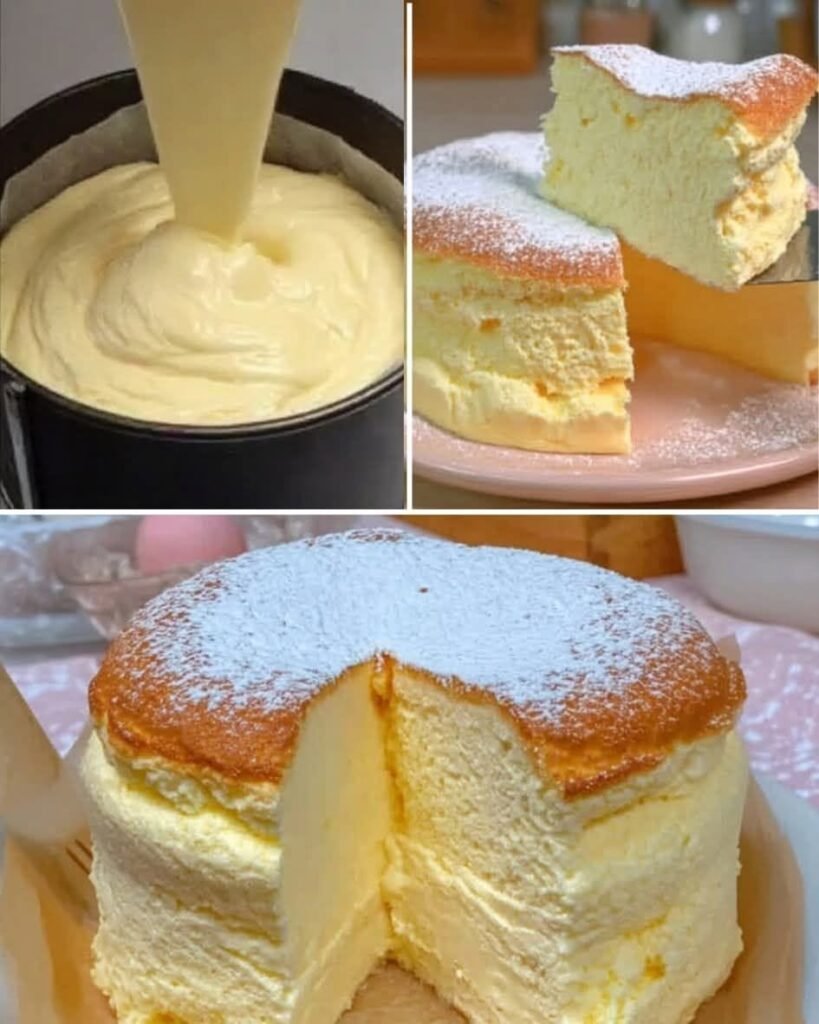

Cloud cake is an incredibly light, soft, and airy cake with a delicate texture that almost seems to melt in your mouth. The name “cloud cake” comes from its fluffy, cloud-like consistency. Unlike dense pound cakes or rich chocolate cakes, this cake is designed to be exceptionally light, tender, and spongy.
It is an excellent choice for afternoon tea, birthdays, family gatherings, or simply when you want a homemade dessert that feels special without being overly heavy. The secret to a successful cloud cake is incorporating plenty of air into the batter and handling it gently so that the cake remains light after baking.
Ingredients
For the Cake
- 1 cup (120 g) cake flour or all-purpose flour
- 1 teaspoon baking powder
- ¼ teaspoon salt
- 4 large eggs, separated
- ½ cup (100 g) granulated sugar, divided
- ¼ cup (60 ml) whole milk
- ¼ cup (60 ml) neutral vegetable oil
- 1 teaspoon vanilla extract
- ½ teaspoon lemon juice or cream of tartar
For the Cream Topping
- 1 cup (240 ml) cold heavy whipping cream
- 2–3 tablespoons powdered sugar
- 1 teaspoon vanilla extract
Optional Garnishes
- Fresh strawberries
- Blueberries
- Raspberries
- Peach slices
- Shredded coconut
- Powdered sugar
- White chocolate shavings
- Mint leaves
Equipment Needed
- 8-inch round cake pan
- Two mixing bowls
- Electric hand mixer or stand mixer
- Fine-mesh sieve
- Rubber spatula
- Whisk
- Parchment paper
- Cooling rack
Step 1: Prepare the Oven and Cake Pan
Begin by preheating your oven to 325°F (165°C). Proper oven temperature is particularly important for cloud cake because a temperature that is too high can cause the cake to rise quickly and then collapse.
Line the bottom of an 8-inch round cake pan with parchment paper. If you are using a removable-bottom pan, make sure it is properly secured. Avoid heavily greasing the sides of the pan. The batter needs some grip on the sides of the pan as it rises.
If you prefer a taller cake, you can use a smaller pan, but keep in mind that baking time will need to be adjusted.
Step 2: Sift the Dry Ingredients
Place the flour, baking powder, and salt into a bowl. Sift them together at least once.
Sifting may seem like a small step, but it makes a noticeable difference in a light cake. It removes lumps and distributes the baking powder and salt evenly throughout the flour.
For the softest possible texture, cake flour is ideal. However, regular all-purpose flour works very well too.
Step 3: Separate the Eggs
Carefully separate the four eggs, placing the egg whites in one large, completely clean bowl and the yolks in another.
This step is extremely important. Even a small amount of egg yolk or grease in the egg whites can make them difficult to whip properly.
Allow the eggs to come close to room temperature if possible. Room-temperature egg whites generally whip more easily and produce good volume.
Step 4: Prepare the Egg Yolk Mixture
Add the milk, vegetable oil, vanilla extract, and about half of the granulated sugar to the egg yolks.
Whisk until the mixture is smooth and slightly pale.
Gradually add the sifted dry ingredients to the yolk mixture. Stir gently until there are no large lumps. Do not overmix. The batter does not need to be perfectly fluffy at this stage because the egg whites will provide most of the cake’s airy structure.
If the batter seems slightly thick, that is perfectly normal.
Step 5: Whip the Egg Whites
Now comes the most important part of the recipe.
Using an electric mixer, beat the egg whites on medium speed until they become foamy. Add the lemon juice or cream of tartar.
Continue beating while gradually adding the remaining granulated sugar.
Increase the speed to medium-high and continue mixing until the egg whites reach medium-stiff to stiff peaks.
To test them, lift the beaters from the bowl. The egg whites should form a peak that holds its shape. However, they should still look smooth and glossy rather than dry or grainy.
Avoid overbeating the whites. Dry, clumpy egg whites are harder to incorporate into the batter and can produce a less tender cake.
Step 6: Fold the Egg Whites Into the Batter
Add approximately one-third of the whipped egg whites to the egg yolk mixture.
Use a rubber spatula to gently fold them in. This first portion can be mixed slightly more vigorously because its purpose is to lighten the heavier yolk batter.
Next, add another third of the egg whites. Fold gently by bringing the spatula from the bottom of the bowl upward and over the top.
Finally, add the remaining egg whites and fold carefully until the batter is evenly combined.
Do not stir aggressively or whisk at this stage. The goal is to preserve as many air bubbles as possible.
Those tiny air bubbles are what give cloud cake its characteristic fluffy texture.
Step 7: Transfer the Batter to the Pan
Pour the batter into your prepared cake pan.
Gently tap the pan once or twice on the countertop to remove only very large air pockets. Do not repeatedly bang the pan because this can remove the air you worked so hard to incorporate.
Use a spatula to smooth the top.
Place the cake in the center of the preheated oven.
Step 8: Bake the Cloud Cake
Bake for approximately 35–45 minutes, depending on your oven and the exact size and material of your pan.
Try not to open the oven during the first 25–30 minutes. A sudden drop in temperature can cause a delicate cake to collapse.
The cake is ready when the top is lightly golden, the center feels springy when gently pressed, and a toothpick inserted into the center comes out clean or with a few moist crumbs.
If the top begins browning too quickly, you can loosely cover it with aluminum foil during the later part of baking.
Remember that every oven behaves differently, so use the appearance and texture of the cake as additional guides rather than relying solely on the clock.
Step 9: Cool the Cake
Once baked, remove the cake from the oven and allow it to cool in the pan for about 10 minutes.
Then carefully remove it from the pan and place it on a wire rack.
Allow it to cool completely before adding whipped cream.
This is important because warm cake can melt the cream and make the finished dessert messy.
If your cake has risen into a small dome, you can leave it as it is for a rustic appearance or gently trim the top with a serrated knife for a more even finish.
Step 10: Make the Whipped Cream
Pour the cold heavy whipping cream into a chilled mixing bowl.
Add powdered sugar and vanilla extract.
Beat with an electric mixer until soft or medium-stiff peaks form.
Do not overwhip the cream. Once it becomes grainy or starts turning yellowish, you are getting close to making butter.
For a lighter, less sweet cake, use only two tablespoons of powdered sugar.
Step 11: Decorate the Cake
Place the completely cooled cloud cake on a serving plate.
Spread the whipped cream over the top using a spatula. You can cover the sides as well, or leave them exposed for a simple homemade appearance.
Arrange fresh strawberries, blueberries, raspberries, or other fruit over the cream.
For an elegant finish, dust the cake lightly with powdered sugar. You can also add white chocolate shavings or a little shredded coconut.
There is no need to make the decoration complicated. The beauty of cloud cake is its simple, soft, delicate appearance.
Tips for the Perfect Cloud Cake
The first and most important tip is to keep the egg-white bowl completely clean and dry. Fat or egg yolk can prevent the whites from developing enough volume.
Second, do not rush the egg-whipping process. Gradually adding sugar helps create a stable meringue.
Third, be gentle when folding. If you mix too aggressively, you will deflate the egg whites and lose the airy texture.
Fourth, do not overbake the cake. Excessive baking can make it dry and reduce its delicate texture.
Another important tip is to measure flour accurately. Too much flour can turn a light cake into a dense one. If you have a kitchen scale, weighing the flour is preferable.
Finally, let the cake cool completely before decorating it. This prevents the whipped cream from melting.
How to Store Cloud Cake
Because this recipe uses whipped cream and fresh fruit, the finished cake should be stored in the refrigerator.
Place it in an airtight cake container or cover it loosely with plastic wrap. It is best enjoyed within 2–3 days.
If you want to prepare the cake ahead of time, you can bake the sponge a day in advance and store it well covered at room temperature if your kitchen is cool. Add the whipped cream and fruit shortly before serving.
Easy Variations
You can customize cloud cake in many ways.
For a lemon cloud cake, add finely grated lemon zest to the egg yolk mixture and replace the vanilla with a little fresh lemon juice.
For a chocolate version, replace a small portion of the flour with unsweetened cocoa powder. Keep the total amount of dry ingredients balanced so the cake remains light.
For a strawberry cloud cake, spread whipped cream over the cooled cake and cover it with sliced strawberries.
For a coconut cloud cake, add a little coconut extract to the batter and decorate the finished cake with toasted coconut.
You can also serve individual slices with fresh fruit and a drizzle of honey or fruit sauce.
Frequently Asked Questions
Why did my cloud cake collapse?
A cloud cake can collapse if the egg whites were under-whipped, over-whipped, or deflated during folding. Opening the oven too early or removing the cake before it has fully baked can also contribute to collapse.
Can I use all-purpose flour?
Yes. Cake flour produces an especially tender result, but all-purpose flour works well when measured accurately.
Can I make this cake without cream?
Absolutely. The cake itself is delicious without frosting. Simply dust it with powdered sugar and serve it with fresh fruit.
Why is my cake dense?
The most common reason is loss of air from the whipped egg whites. Overmixing during folding, using poorly whipped whites, or adding too much flour can all make the cake heavier.
Can I use a different pan?
Yes, but the baking time will change. A wider pan will produce a shorter cake and may require less baking time, while a smaller pan will produce a taller cake and may need longer baking.
Final Thoughts
Cloud cake is all about achieving the perfect balance between air, moisture, and gentle mixing. Although the recipe requires a little more care than a basic butter cake, the result is worth the effort. The finished cake should be soft, springy, delicate, and wonderfully light.
The combination of a fluffy sponge, lightly sweetened whipped cream, and fresh fruit makes this dessert both beautiful and refreshing. It is simple enough for a family dessert but elegant enough for a celebration.
Once you master the technique of whipping and folding egg whites, you can use the same method to create many other airy desserts. The key is patience: whip the eggs properly, fold them gently, bake at a moderate temperature, and allow the cake to cool before decorating.
Serve your cloud cake chilled or at cool room temperature with tea, coffee, or a glass of milk. Cut it into soft slices and enjoy the delicate, cloud-like texture in every bite.