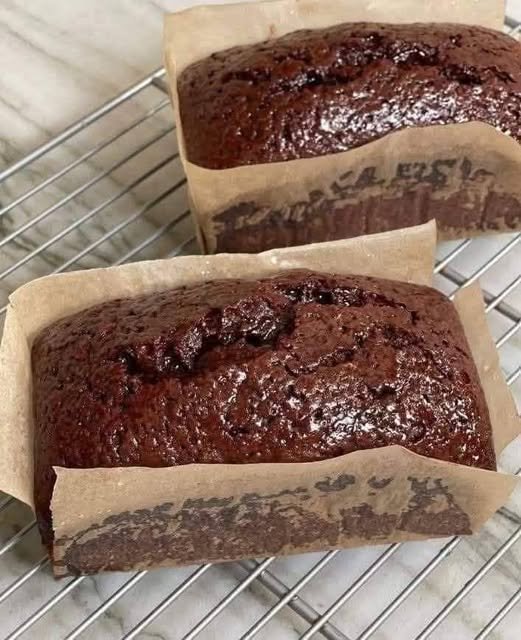

Ingredients
For the Dough
- 100 grams active sourdough starter
- 350 grams bread flour
- 50 grams unsweetened cocoa powder
- 250–280 grams water
- 50 grams brown sugar
- 8 grams salt
- 30 grams unsalted butter, softened
- 1 teaspoon vanilla extract
- 100–150 grams chocolate chips or chopped chocolate
Optional Additions
- 50 grams dried cherries
- 50 grams dried cranberries
- 50–75 grams chopped walnuts or pecans
- ½ teaspoon cinnamon
- ½–1 teaspoon espresso powder
- Extra chocolate chunks for the top
Choosing Your Chocolate
The chocolate you choose will have a major effect on the final flavor of your bread.
Dark chocolate is an excellent choice if you want a rich, slightly bitter chocolate flavor. Semi-sweet chocolate gives you a nice balance between sweetness and cocoa intensity, while milk chocolate produces a softer and sweeter loaf.
Chocolate chips are convenient because they maintain their shape relatively well during baking. Chopped chocolate creates a more rustic result, with some larger melted pockets throughout the bread.
For an especially luxurious loaf, use a mixture of dark chocolate chunks and semi-sweet chocolate chips.
Step 1: Prepare Your Sourdough Starter
Before beginning the recipe, make sure your sourdough starter is active and healthy.
A strong starter should look bubbly and airy and should have increased noticeably in volume after feeding. If your starter has been sitting in the refrigerator, give it enough time to become active before using it.
Using an active starter is important because the starter is responsible for fermenting and leavening the dough.
Step 2: Mix the Dry Ingredients
Add the bread flour and unsweetened cocoa powder to a large mixing bowl.
Whisk them together thoroughly so the cocoa is evenly distributed throughout the flour.
Cocoa powder can sometimes form small lumps, so mixing it well at this stage helps create an evenly colored dough.
If you’re using cinnamon or espresso powder, you can add them now as well.
Step 3: Add the Wet Ingredients
Add the active sourdough starter, brown sugar, vanilla extract, and approximately 250 grams of water to the flour mixture.
Use your hand, a wooden spoon, or a dough whisk to mix everything together.
The dough may look rough and sticky at first. That’s completely normal.
Don’t worry if it doesn’t look smooth yet. The dough will develop more strength during resting, folding, and fermentation.
If the dough feels extremely dry, add some of the remaining water a little at a time.
Because different flours absorb different amounts of water, it is better to add water gradually rather than adding all of it immediately.
Step 4: Rest the Dough
Cover the bowl and let the dough rest for approximately 30 minutes.
This resting period allows the flour to absorb the water and gives the gluten time to begin developing naturally.
This process makes the dough easier to handle later.
Step 5: Add the Salt and Butter
After the resting period, sprinkle the salt over the dough.
Add the softened butter and gently work both ingredients into the dough.
You can use a squeezing motion with your hands, folding the dough over itself repeatedly until the butter is completely incorporated.
At first, the dough may feel slippery because of the butter. Keep working it gently until it begins to feel more cohesive.
Step 6: Start Stretching and Folding
Now begin the stretch-and-fold process.
With damp hands, grab one side of the dough and gently stretch it upward. Fold that portion over the center.
Rotate the bowl and repeat the process on another side.
Continue until you have folded all four sides.
Cover the bowl and let the dough rest for approximately 30 minutes.
Repeat the stretch-and-fold process every 30 minutes for the next 1½–2 hours.
As you continue folding, you should notice that the dough becomes smoother, stronger, and more elastic.
Step 7: Add the Chocolate
Once the dough has developed some strength, it is time to add the chocolate.
Lightly wet your work surface and gently turn the dough onto it.
Carefully stretch the dough into a rough rectangle.
Scatter the chocolate chips or chopped chocolate evenly over the dough.
If you’re adding dried cherries, cranberries, or nuts, sprinkle them over the chocolate.
Fold the dough over itself several times to distribute the fillings.
Try not to knead aggressively because this can damage the developing gluten structure.
You want the chocolate and other additions to be evenly distributed without overworking the dough.
Step 8: Bulk Fermentation
Place the dough back into a clean bowl and cover it.
Leave it at room temperature for the bulk fermentation.
The exact fermentation time will depend on the temperature of your kitchen, the strength of your starter, and the temperature of your dough.
It can take approximately 4–8 hours.
Instead of relying only on the clock, watch the dough.
It should become noticeably larger, lighter, and more aerated. You may see bubbles forming around the sides of the bowl.
The dough doesn’t necessarily need to double in size. A significant increase in volume and a visibly airy texture are better indicators.
Step 9: Pre-Shape the Dough
When bulk fermentation is complete, lightly flour your work surface.
Carefully turn the dough out onto the surface.
Gently shape it into a loose round.
Try to avoid pressing all the air out of the dough.
Let the dough rest uncovered for approximately 15–20 minutes.
This bench rest allows the gluten to relax before the final shaping.
Step 10: Shape the Loaf
For a round loaf, gently pull the edges of the dough toward the center.
Flip the dough over so the seam is underneath.
Use your hands or a bench scraper to gently drag the dough toward yourself across the work surface.
This creates surface tension.
Continue shaping until you have a smooth, reasonably tight round.
If you prefer an oval loaf, shape the dough accordingly and place it into an oval banneton.
Step 11: Cold Proof the Dough
Generously flour a banneton or a bowl lined with a clean kitchen towel.
Place the shaped dough into the basket with the seam facing upward.
Cover it well and place it in the refrigerator.
Allow the dough to cold-proof for approximately 8–16 hours.
Overnight fermentation is particularly convenient because you can shape the dough in the evening and bake it the following morning.
Cold fermentation also develops a deeper flavor and makes the dough easier to score.
Step 12: Preheat the Oven
The next day, place a Dutch oven or another suitable covered baking vessel inside your oven.
Preheat the oven to 230°C / 450°F.
Allow the Dutch oven to heat for at least 30–45 minutes.
A properly heated baking vessel helps create strong oven spring during the first part of baking.
Step 13: Score the Dough
Remove the chilled dough from the refrigerator.
Place a piece of parchment paper on your work surface.
Carefully turn the dough onto the parchment.
Use a sharp bread lame or razor blade to score the top.
A simple long slash works beautifully.
You can also create a decorative pattern if you want your loaf to look especially impressive.
Score with confidence and avoid repeatedly cutting the same area.
Step 14: Bake the Chocolate Sourdough
Carefully transfer the dough into the preheated Dutch oven.
Cover with the lid and place it in the oven.
Bake at 230°C / 450°F for approximately 20 minutes.
The covered environment traps steam, which helps the loaf expand and develop its crust.
After 20 minutes, carefully remove the lid.
Reduce the oven temperature to approximately 210°C / 410°F.
Continue baking for another 20–25 minutes.
The bread should develop a rich, dark crust.
Because cocoa naturally makes the loaf dark, be careful not to judge doneness by color alone.
Step 15: Cool Completely
Once baked, carefully remove the loaf from the Dutch oven.
Place it on a wire rack.
Allow it to cool for at least 1–2 hours before slicing.
This is one of the hardest parts of making sourdough because the loaf smells incredible.
However, cutting it too early can result in a gummy or compressed crumb.
The bread continues to cook and set internally while it cools.
How to Serve Chocolate Sourdough
There are countless ways to enjoy this bread.
For breakfast, toast a thick slice and spread it with butter.
For a sweeter option, add peanut butter and sliced banana.
Cream cheese also works beautifully with the chocolate flavor.
You can serve it alongside fresh strawberries, raspberries, blueberries, or cherries.
For dessert, toast the bread and serve it with a scoop of vanilla ice cream.
Another delicious option is to make French toast using thick slices of chocolate sourdough.
Flavor Variations
Chocolate Cherry Sourdough
Add dried cherries along with the chocolate. The tartness of the cherries balances the richness of the cocoa beautifully.
Chocolate Walnut Sourdough
Add chopped walnuts or pecans for crunch and a slightly nutty flavor.
Double Chocolate Sourdough
Use cocoa powder in the dough and add a generous amount of chocolate chunks.
Chocolate Cinnamon Sourdough
Add ½ teaspoon of cinnamon for a warm, aromatic flavor.
Chocolate Orange Sourdough
Add a little finely grated orange zest to the dough and combine it with dark chocolate.
The citrus flavor pairs exceptionally well with rich cocoa.
Common Problems and Solutions
My dough is too sticky.
Chocolate sourdough can naturally be somewhat sticky. Avoid adding large amounts of extra flour because this can make the finished loaf dense.
Instead, use slightly wet hands when handling the dough.
My dough isn’t rising.
Your starter may not be active enough, or your kitchen may be cool.
Give the dough more time and make sure your starter is bubbly and strong before your next attempt.
My bread is dense.
Dense sourdough can result from under-fermentation, weak starter activity, or insufficient gluten development.
Pay attention to the dough rather than following fermentation times blindly.
My chocolate melted completely.
Some chocolate varieties melt more readily than others.
For visible chocolate pieces, use chocolate chips or larger chunks of baking chocolate.
The crust is getting too dark.
Cocoa naturally darkens the loaf, so it can be difficult to judge the crust by appearance.
If the outside is becoming too dark before the bread is fully baked, loosely cover the loaf with foil during the final part of baking.
Storage
Once completely cooled, store the chocolate sourdough in a bread bag or airtight container at room temperature.
It is best enjoyed within 2–3 days.
For longer storage, slice the loaf and freeze the individual slices.
Place parchment between slices if desired, then store them in a freezer-safe bag.
When you’re ready to eat one, simply toast it directly from frozen.
Final Thoughts
Chocolate sourdough is a wonderful recipe for anyone who loves both homemade sourdough and chocolate. The naturally fermented dough provides a subtle tang and chewy structure, while cocoa and chocolate create a rich flavor that makes every slice feel special.
The key to a successful loaf is patience. Give your starter enough time to become active, allow the dough to ferment properly, develop gluten through gentle folds, and don’t rush the final cooling stage.
Once you’ve mastered the basic recipe, you can experiment with different chocolates, dried fruits, nuts, spices, and flavor combinations.
Whether served toasted for breakfast, enjoyed with a cup of coffee or tea, transformed into French toast, or simply eaten warm with butter, this Chocolate Sourdough Bread is a delicious homemade loaf that is well worth the time and effort.
Add precise preparation and yield detailsClarify the complete fermentation timeline