
Ingredients
For the blooming onion
- 1 large sweet onion (Vidalia or another large yellow onion)
- 1 cup all-purpose flour
- 2 large eggs
- ½ cup milk
- 1 teaspoon paprika
- 1 teaspoon garlic powder
- ½ teaspoon onion powder
- ½ teaspoon cayenne pepper (optional)
- ½ teaspoon salt, or to taste
- ½ teaspoon ground black pepper
- Olive oil spray or another cooking oil spray
For the creamy dipping sauce
- ½ cup mayonnaise
- 1 tablespoon ketchup
- 1 teaspoon prepared horseradish (optional)
- ½ teaspoon paprika
- ¼ teaspoon garlic powder
- ¼ teaspoon cayenne pepper
- 1 teaspoon lemon juice
- Salt and black pepper to taste
Instructions
Step 1: Prepare the onion
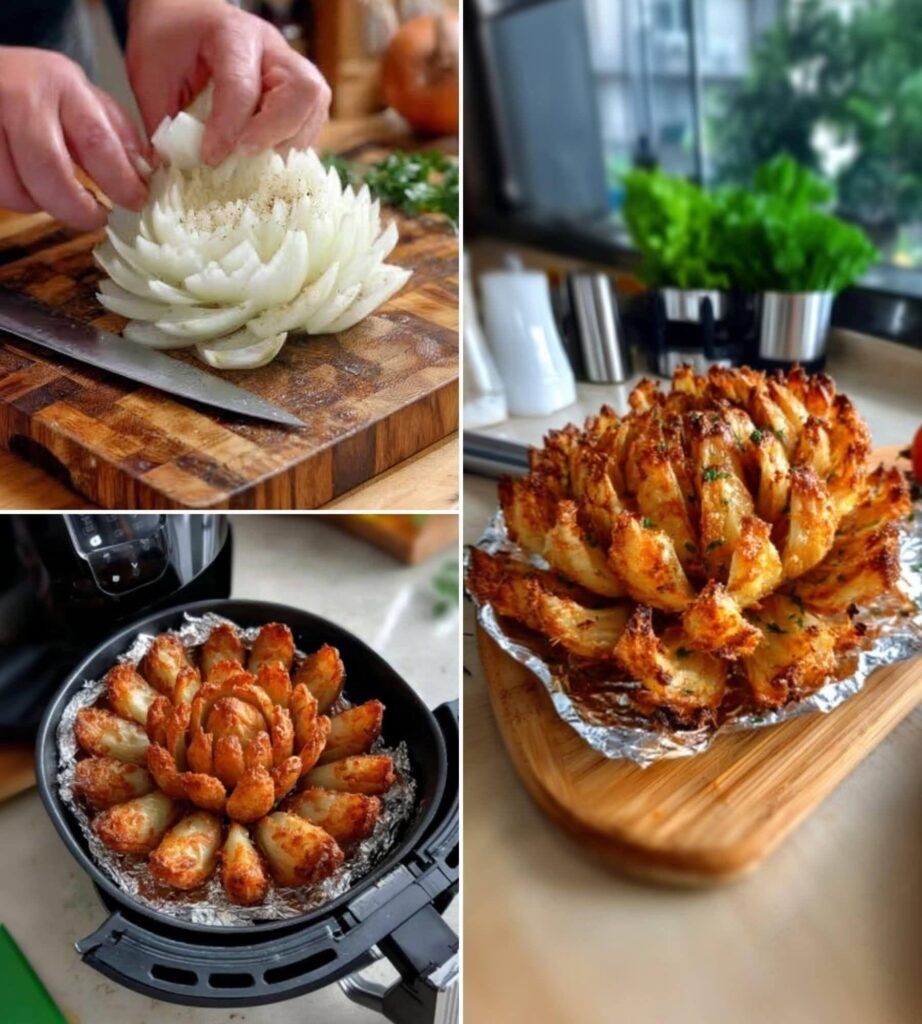
Peel the onion and trim about ½ inch from the pointed top, leaving the root end intact. Place it cut-side down on a cutting board. Starting about ½ inch from the root, make four evenly spaced vertical cuts downward. Make additional cuts between them to create 12–16 petals, taking care not to cut through the root. Turn the onion over and gently separate the petals.
Step 2: Mix the seasoned flour
In a medium bowl, combine the flour, paprika, garlic powder, onion powder, cayenne pepper, salt, and black pepper. Mix thoroughly so the seasonings are evenly distributed. In a separate bowl, whisk together the eggs and milk until smooth. These two mixtures create the flavorful coating that makes the onion crispy.
Step 3: Coat the onion
Place the onion in the seasoned flour and carefully coat between all the petals. Shake off excess flour. Slowly pour or spoon the egg mixture over the onion, making sure it reaches the inner layers. Return the onion to the flour mixture for a second coating, gently pressing flour into the petals. Shake off loose flour and let the coated onion rest for 5 minutes to help the coating adhere.
Step 4: Preheat the air fryer
Preheat your air fryer to 350°F (175°C) for approximately 3–5 minutes, following your appliance’s instructions. Lightly spray the basket with oil. Carefully place the onion in the basket, root-side down and petals facing upward. Spray the coated petals lightly with oil to encourage even browning.
Step 5: Air fry until crispy
Cook at 350°F (175°C) for 15–20 minutes, depending on the onion’s size and your air fryer. Check after 10 minutes. If the outside is browning too quickly, reduce the temperature slightly. The petals should become golden brown and crisp while the inside turns tender. If needed, add a few extra minutes. Avoid overcrowding, and remember that flour coating should not remain visibly raw.
Step 6: Prepare the dipping sauce
While the onion cooks, combine mayonnaise, ketchup, horseradish, paprika, garlic powder, cayenne pepper, lemon juice, salt, and black pepper in a small bowl. Stir until smooth and creamy. Taste and adjust the spice level or lemon juice to your preference. Refrigerate until serving so the flavors can blend.
Step 7: Serve and enjoy
Carefully remove the blooming onion from the air fryer using a spatula. Allow it to cool for 2–3 minutes, then transfer it to a serving plate. Place the dipping sauce in the center or alongside the onion. Pull off individual crispy petals and dip them into the sauce. Serve immediately for the best texture and flavor.
Tips for the perfect blooming onion
- Choose the right onion: A large, round sweet onion is ideal because its petals separate easily and offer a milder flavor.
- Keep the root intact: The root holds the petals together, so avoid cutting all the way through it.
- Coat every petal: Work slowly to distribute flour and egg mixture between the layers for better coverage.
- Use oil spray: A light, even coating helps the flour turn golden and crisp. Avoid aerosol sprays that are incompatible with your air fryer basket.
- Adjust the cooking time: Smaller onions may cook faster, while larger ones may need extra time. Air fryer models vary, so check frequently.
- Make it extra spicy: Add more cayenne to the flour or dipping sauce, or include a dash of hot sauce.
- Try a cheesy variation: Sprinkle a little finely grated Parmesan over the onion during the final few minutes of cooking.
Serving suggestions
Serve your air fryer blooming onion with burgers, sandwiches, grilled chicken, or crispy potato wedges. It also makes a wonderful appetizer for game nights, family gatherings, and casual parties. For a colorful presentation, garnish the plate with chopped parsley and lemon wedges.
For a lighter alternative to mayonnaise-based dip, mix Greek yogurt with lemon juice, garlic powder, paprika, and a pinch of salt. You can also offer barbecue sauce or honey mustard for variety.
Storage and reheating
Blooming onions taste best fresh from the air fryer. If you have leftovers, refrigerate them in an airtight container within two hours and use within 3–4 days. Reheat in the air fryer at 325–350°F (165–175°C) for approximately 3–6 minutes, checking frequently until heated through and crisp again. Avoid microwaving if you want to preserve the crunchy coating. Store the dipping sauce separately in the refrigerator.
Nutrition information
Estimated per serving, assuming the recipe serves four and includes some dipping sauce:
- Calories: 250–350
- Carbohydrates: 25–35 g
- Protein: 5–8 g
- Fat: 15–22 g
- Fiber: 2–4 g
Actual nutrition will vary depending on the onion’s size, how much coating and oil remain on it, and the amount of dipping sauce consumed.
Final thoughts
This Air Fryer Blooming Onion brings the fun of a restaurant favorite into your kitchen with less oil and simple pantry ingredients. Its crunchy seasoned petals, soft onion center, and tangy dipping sauce make every bite delicious. Take your time cutting and coating the onion, spray it lightly with oil, and cook until golden and crisp. Once you master the technique, you can experiment with different seasonings and sauces to create your own signature appetizer. Serve it hot, share it with family and friends, and enjoy a satisfying homemade snack without deep frying.