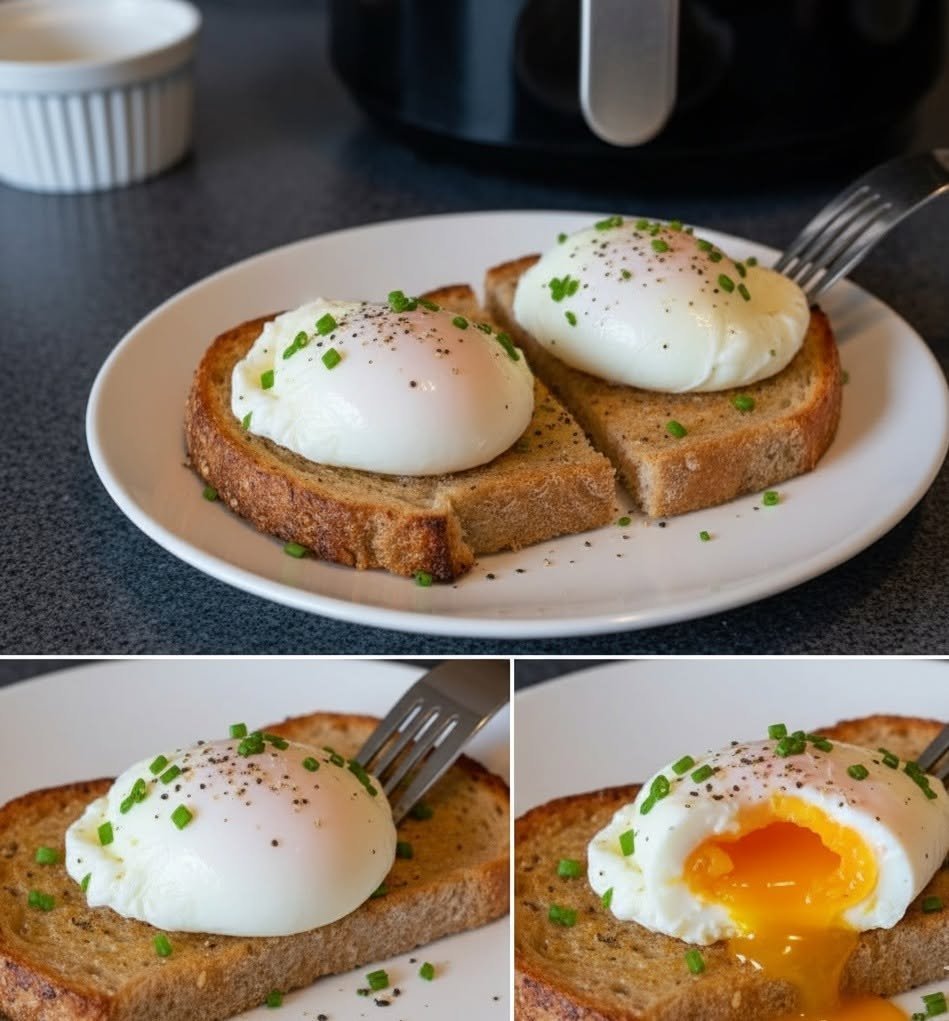

Mastering the Art of Poached Eggs in an Air Fryer
Ingredients
- 2 large fresh eggs
- 2 teaspoons water
- Cooking spray or a small amount of butter, for greasing
- Salt, to taste
- Freshly ground black pepper, to taste
- Fresh herbs, optional, for serving
- Toast, avocado, or other toppings, optional
Equipment
- Air fryer
- 2 small oven-safe ramekins or shallow heatproof dishes
- Small spoon
- Slotted spoon, optional
Step 1: Choose Fresh Eggs
Fresh eggs are one of the most important secrets to successful poaching. As eggs age, the white becomes thinner and tends to spread more easily. A fresh egg has a thicker white that stays closer to the yolk, helping you achieve a more compact, attractive poached egg.
If possible, use eggs that have been refrigerated and are relatively fresh. You can also crack each egg into a small bowl first rather than directly into the ramekin. This makes it easier to remove any shell fragments and check the egg before cooking.
Step 2: Prepare the Ramekins
Lightly grease two small oven-safe ramekins with cooking spray or a thin layer of butter. The goal is simply to prevent the egg from sticking.
Add about 1 teaspoon of water to each ramekin. The water creates moisture around the egg as it cooks and helps produce a tender texture.
Don’t fill the ramekin with too much water. A small amount is enough; excessive water can make the egg more difficult to handle and may affect the cooking process.
Step 3: Preheat the Air Fryer
Preheat your air fryer to 350°F (175°C) for approximately 3–5 minutes, depending on your model.
Preheating is useful because it gives the eggs a consistent cooking environment from the moment they enter the basket. Air fryers vary considerably in power and design, so you may need to adjust the cooking time slightly after testing your particular appliance.
Step 4: Add the Eggs
Carefully crack one egg into each prepared ramekin.
Try to keep the yolk intact. If a yolk breaks, the egg will still be edible, but it won’t have the classic poached-egg appearance.
Place the ramekins carefully into the air fryer basket. Make sure they are sitting flat and aren’t touching the heating element.
Step 5: Air Fry the Eggs
Cook the eggs at 350°F (175°C) for approximately 7–9 minutes.
Start checking around the 7-minute mark. Cooking time can vary depending on the size of the eggs, the type of ramekin, the amount of water used, and the air fryer itself.
For a very runny yolk, you may find that around 7 minutes works best. For a slightly firmer yolk and more fully cooked white, continue toward 8–9 minutes.
Remember that the eggs will continue cooking slightly after you remove them from the air fryer, so don’t wait until the yolk appears completely firm if you want it runny.
Step 6: Check for Doneness
Carefully remove one ramekin from the air fryer. The egg white should look opaque and mostly set, while the yolk should still have some movement when gently shaken.
If the white looks too loose, return the ramekin to the air fryer for another 30–60 seconds.
Because every air fryer behaves differently, consider your first batch a test run. Once you know exactly how long your appliance takes, you can repeat the result much more consistently.
Step 7: Remove the Eggs
When the eggs are cooked to your preferred level, carefully remove the ramekins—they will be hot.
Run a small spoon around the edge of the egg to loosen it. You can then gently lift it out.
If you prefer, use a small slotted spoon to transfer the egg to a plate. Allow excess water to drain before serving.
Season immediately with salt and freshly ground black pepper.
Tips for Perfect Air Fryer Poached Eggs
Use fresh eggs: This is perhaps the biggest factor in getting a neat poached egg.
Don’t skip the water: A small amount of water helps create a moist cooking environment.
Preheat the air fryer: Starting with a hot air fryer helps make cooking times more predictable.
Don’t overcrowd the basket: Leave enough space for air circulation and easy removal of the ramekins.
Check early: Air fryers can cook differently. Start checking before the suggested maximum time rather than automatically cooking the eggs for the full duration.
Use shallow ramekins: A shallow dish can make it easier to achieve an evenly cooked egg and remove it afterward.
Make one test egg first: If you’re cooking for guests, test the timing with one egg before preparing a larger batch.
How to Serve Air Fryer Poached Eggs
A perfectly poached egg can turn a simple breakfast into something special. Serve it on toasted sourdough with avocado, sprinkle it with chili flakes, or place it over sautéed spinach and mushrooms.
For a classic brunch, serve the eggs with English muffins and hollandaise sauce to create an easy version of Eggs Benedict. You can also place a poached egg on a bowl of roasted vegetables, rice, or a fresh green salad.
For a simple everyday meal, toast a slice of your favorite bread, spread it with butter or avocado, and top it with the poached egg. Finish with salt, pepper, and a few fresh herbs.
Troubleshooting
The egg white is still runny: Cook it for another 30–60 seconds and check again.
The yolk is too firm: Reduce the cooking time during your next batch.
The egg sticks to the ramekin: Grease the ramekin more thoroughly before adding the egg.
The egg looks uneven: Make sure the ramekin is sitting level in the air fryer and use a fresh egg.
The top becomes too dry: Try reducing the cooking time slightly or checking the egg earlier.
Final Thoughts
Mastering poached eggs in an air fryer is mostly about finding the right timing for your particular appliance. Once you establish that sweet spot, the process becomes remarkably easy. Fresh eggs, lightly greased ramekins, a little water, and careful timing are all you need.
The result is a tender egg white surrounding a luscious, runny yolk—perfect for toast, brunch dishes, salads, or a quick protein-rich breakfast. After a little experimentation, air fryer poached eggs can become one of the easiest ways to enjoy this classic dish at home.