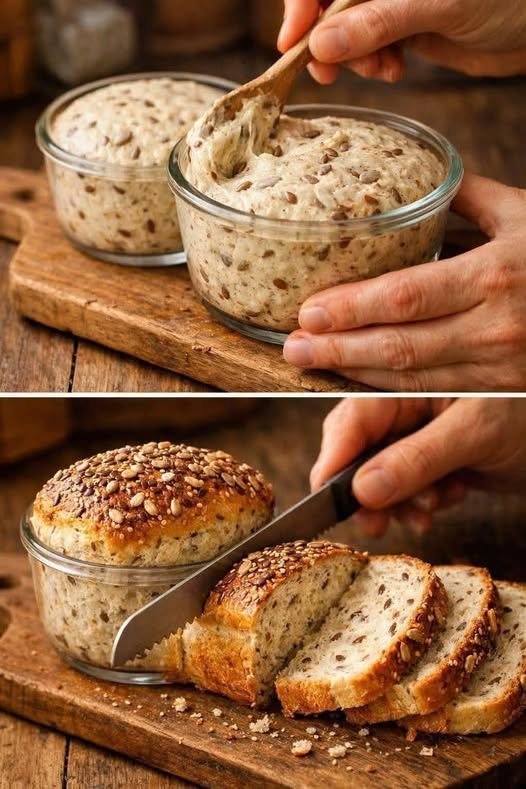

3-Ingredient Simple Gluten-Free Seeded Bread
Ingredients
- 2 cups certified gluten-free rolled oats
- 1 cup mixed seeds — such as sunflower seeds, pumpkin seeds, flaxseeds, sesame seeds, or chia seeds
- 1½ cups water
Optional additions such as salt, herbs, spices, or a little maple syrup can be used if desired, but the basic recipe needs only these three ingredients.
Equipment
- Food processor or high-speed blender
- Mixing bowl
- 8 × 4-inch loaf pan
- Parchment paper
- Spatula
- Wire cooling rack
Instructions
1. Prepare the oats
Place the rolled oats in a food processor or blender. Process them until they become a coarse flour.
You don’t need to turn the oats into an extremely fine powder. A slightly coarse texture works beautifully and gives the finished bread a rustic, hearty crumb.
If you prefer a bread with a little more texture, leave a small portion of the oats partially intact rather than processing everything completely.
2. Combine the ingredients
Transfer the ground oats to a large mixing bowl. Add the mixed seeds and stir until evenly distributed.
Pour in the water gradually while mixing with a spatula or wooden spoon. The mixture will initially look quite wet, but the oats and seeds will absorb the water as they sit.
Continue stirring until everything is thoroughly combined and there are no obvious dry pockets of oats.
The mixture should resemble a very thick, sticky batter rather than traditional bread dough.
3. Let the mixture rest
Cover the bowl and allow the mixture to rest for 15–20 minutes.
This step is important because the oats and seeds need time to absorb the water. Flaxseeds and chia seeds are particularly good at absorbing liquid and helping the loaf hold together.
After resting, stir the mixture again. It should now be noticeably thicker and easier to shape.
If it still seems extremely loose, allow it to rest for another 5–10 minutes.
4. Prepare the loaf pan
Preheat your oven to 350°F (175°C).
Line an 8 × 4-inch loaf pan with parchment paper, leaving a little paper hanging over the sides. This makes removing the bread much easier after baking.
You can lightly grease the pan before adding the parchment if you want the paper to stay firmly in place.
5. Fill the pan
Transfer the thick oat-and-seed mixture into the prepared loaf pan.
Use a spatula or the back of a spoon to press it down firmly and smooth the top.
Don’t simply pour the mixture into the pan and leave it loose. Pressing it down helps remove air pockets and encourages the ingredients to bind together into a cohesive loaf.
For an attractive finish, sprinkle a few extra seeds over the surface if you have them available.
6. Bake
Place the pan in the preheated oven and bake for approximately 50–60 minutes.
The bread should feel firm when gently pressed in the center, and the top should look dry and lightly browned.
Because ovens vary, begin checking the loaf around the 50-minute mark. If the center still feels very soft or wet, continue baking for another 5–10 minutes.
7. Cool completely
Remove the pan from the oven and allow the bread to cool for about 10 minutes.
Then carefully lift the loaf out using the parchment paper and transfer it to a wire rack.
Allow it to cool completely before slicing.
This is one of the most important steps in the recipe. The interior continues to set as the bread cools, so cutting it while hot can make the slices appear gummy or cause the loaf to crumble.
Once completely cool, use a sharp serrated knife to cut the bread into slices.
Tips for the Best Seeded Bread
Use certified gluten-free oats. Oats themselves are naturally gluten-free, but they can become contaminated during processing. If you have celiac disease or are highly sensitive to gluten, choose oats specifically labeled and certified gluten-free.
Don’t skip the resting period. The seeds and oats need time to absorb water. This creates the structure that holds the bread together.
Press the mixture firmly into the pan. A compact mixture produces a loaf that slices much more cleanly.
Cool before slicing. Patience makes a major difference with this type of bread.
Adjust the seeds to your preference. Sunflower seeds provide a mild, slightly nutty flavor, pumpkin seeds add richness and crunch, while flax and chia help with binding. Sesame seeds add a pleasant toasted flavor.
Serving Ideas
This simple seeded bread is excellent toasted. Spread a slice with peanut butter, almond butter, avocado, or your favorite gluten-free spread.
For a savory breakfast, top it with mashed avocado, sliced tomato, and a sprinkle of seeds. You can also use it as the foundation for an open-faced sandwich with hummus and roasted vegetables.
For something sweet, toast a slice and add nut butter with banana or berries.
The bread also pairs nicely with soups and salads. Its dense, hearty texture makes it particularly satisfying when dipped into vegetable soup or served alongside a fresh salad.
Storage
Once completely cool, store the bread in an airtight container at room temperature for about 2 days.
For longer storage, refrigerate it for up to 5–7 days. Because this bread contains moisture and doesn’t use preservatives, refrigeration helps maintain freshness.
You can also slice the entire loaf and freeze the slices individually. Place parchment paper between slices if necessary, then store them in a freezer-safe bag or container for up to 2–3 months.
Frozen slices can be placed directly into a toaster, making this a convenient make-ahead breakfast.
Final Thoughts
This 3-ingredient gluten-free seeded bread is a wonderful example of how simple homemade baking can be. With just oats, seeds, and water, you can create a dense, nutritious loaf without yeast, wheat flour, eggs, or dairy.
The key is giving the mixture enough time to absorb the water and allowing the finished loaf to cool completely before slicing. Once you’ve mastered the basic version, you can experiment with different seed combinations and optional seasonings to create your own favorite variation.
Prep time: 20 minutes Resting time: 15–20 minutes Bake time: 50–60 minutes Total time: About 1 hour 30 minutes Yield: 1 small loaf, approximately 8–10 slices Difficulty: Easy