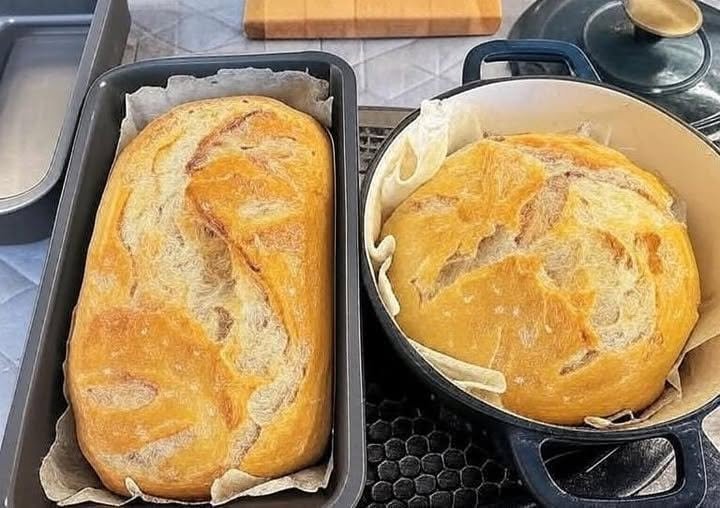

Absolutely — here’s a detailed ~1,000-word Unloaf Sourdough Bread recipe, written as a practical, easy-to-follow recipe. Unloaf Sourdough Bread RecipeIngredients
- 500 g bread flour or strong all-purpose flour
- 350 g water, preferably filtered or room temperature
- 100 g active sourdough starter
- 10 g fine sea salt
- A little rice flour or all-purpose flour for dusting
- Extra water for wetting your hands during folding
The recipe makes one medium-to-large loaf.
Before You Begin
Make sure your sourdough starter is active and ready to use. A healthy starter should have been fed recently and should look bubbly, airy, and expanded. If you place a small amount in water, it may float when it is particularly active, although the float test is not always a reliable measure of readiness.
For the best results, use your starter when it is near its peak—when it has risen significantly and the surface is full of bubbles.
Room temperature has a major effect on fermentation. A warm kitchen will make the dough ferment faster, while a cool kitchen will slow it down. Rather than following the clock exactly, pay attention to how the dough looks and feels.
Step 1: Mix the Dough
Place the flour and about 330 g of the water in a large mixing bowl. Mix with your hand or a dough whisk until there are no obvious dry patches of flour.
Cover the bowl and let the mixture rest for about 30 minutes. This resting period, often called an autolyse, allows the flour to absorb water and begins gluten development.
After the rest, add the active sourdough starter and mix thoroughly. Dissolve the salt in the remaining 20 g of water and add it to the dough.
Use your hands to squeeze, fold, and mix the dough until everything is evenly incorporated. At this stage, the dough may feel sticky and somewhat loose. That is normal.
Cover the bowl and let the dough rest for another 20 to 30 minutes.
Step 2: Develop the Gluten
Instead of aggressively kneading the dough, sourdough can be developed through a series of gentle stretch-and-folds.
With slightly wet hands, grab one side of the dough, stretch it upward without tearing it, and fold it over the center. Rotate the bowl and repeat on the remaining three sides.
That completes one set.
Perform approximately four sets of folds, spaced about 30 minutes apart. As fermentation progresses, you should notice the dough becoming smoother, stronger, and more elastic.
If the dough is very sticky at first, resist the temptation to add lots of flour. Wetting your hands is usually a better solution.
Step 3: Bulk Fermentation
After the final fold, cover the bowl and allow the dough to continue fermenting.
The length of bulk fermentation depends heavily on temperature and starter strength. At a moderate room temperature, it may take approximately 4 to 6 hours from the time the starter was mixed into the dough.
Do not rely solely on the clock. Look for signs that fermentation is progressing.
The dough should become noticeably lighter and puffier. You may see bubbles along the sides or underneath the surface. It should have increased in volume, but it does not necessarily need to double.
When you gently shake the bowl, properly fermented dough should have a soft, slightly jiggly appearance.
Step 4: Pre-Shape the Dough
Lightly flour your work surface and gently turn the dough onto it.
Try not to knock all the air out of the dough. Using a dough scraper, shape it into a loose round by folding the edges toward the center.
Turn the dough seam-side down and use your hands or a bench scraper to gently pull it toward you across the work surface. The friction helps create surface tension.
Let the dough rest uncovered for approximately 20 to 30 minutes.
Step 5: Final Shaping
For a round loaf, gently flatten the dough just enough to make shaping easier. Fold the bottom portion toward the center, then fold the sides inward. Finally, fold the top portion down and roll or tuck the dough into a tight boule.
Place the shaped dough seam-side up into a well-floured proofing basket or a bowl lined with a heavily floured kitchen towel.
Dust the exposed surface with flour and cover it.
Step 6: Cold Proof
For deeper flavor and easier handling, place the covered dough in the refrigerator for approximately 8 to 16 hours.
The cold fermentation slows the yeast activity while allowing the dough to continue developing flavor. It also makes the dough firmer, which makes scoring easier.
If you prefer to bake the bread on the same day, you can allow the shaped loaf to proof at room temperature instead. This may take roughly 1 to 3 hours, depending on temperature and dough activity.
Step 7: Preheat the Oven
For the best crust, use a Dutch oven or another heavy oven-safe covered baking pot.
Place the Dutch oven inside the oven and preheat to 230°C (450°F) for at least 30 to 45 minutes.
A thoroughly heated baking vessel helps create strong oven spring and a crisp crust.
Step 8: Score and Bake
Remove the dough from the refrigerator when you are ready to bake. Turn it carefully onto a sheet of parchment paper.
Using a sharp bread lame or razor blade, make one decisive slash across the top. A cut approximately 1 cm deep is usually sufficient.
Carefully transfer the dough into the hot Dutch oven.
Cover with the lid and bake at 230°C (450°F) for 20 minutes.
Then remove the lid, reduce the oven temperature to approximately 220°C (425°F), and continue baking for another 20 to 25 minutes.
The loaf should become deeply golden brown. For a darker, more caramelized crust, allow it to bake a few additional minutes while watching carefully.
Step 9: Cool Completely
Transfer the finished loaf to a wire rack and resist the temptation to slice it immediately.
Allow it to cool for at least 1 hour, preferably longer. Cutting sourdough while it is still very hot can compress the crumb and make the inside appear gummy.
Once cooled, slice with a serrated bread knife.
You should have a crisp crust, chewy interior, mild sourness, and an aromatic, naturally fermented flavor.
Storage
Store the cooled loaf at room temperature in a bread bag, paper bag, or loosely covered container. Avoid storing freshly baked sourdough in the refrigerator because refrigeration can make the bread stale more quickly.
For longer storage, slice the loaf and freeze the slices in an airtight freezer bag. Individual slices can be toasted directly from frozen.
Helpful Tips for Perfect Sourdough
Use an active starter: Weak starter means slow fermentation and a dense loaf.
Watch the dough, not just the clock: Temperature changes fermentation speed considerably.
Don’t add too much flour: A sticky dough often becomes easier to handle as gluten develops.
Build surface tension: Good shaping helps the loaf hold its structure and rise upward instead of spreading.
Preheat thoroughly: A hot Dutch oven provides excellent oven spring.
Don’t rush the cooling: The crumb continues setting after the loaf comes out of the oven.
With a little practice, this Unloaf Sourdough Bread recipe can become a dependable everyday loaf. Once you understand how your starter and kitchen temperature affect fermentation, you can adjust the timing to fit your schedule while producing a flavorful, crusty loaf with a beautifully chewy interior.
If you’d like, I can also turn this into a professional bakery-style recipe with exact baker’s percentages, fermentation temperatures, and a same-day/overnight timetable.