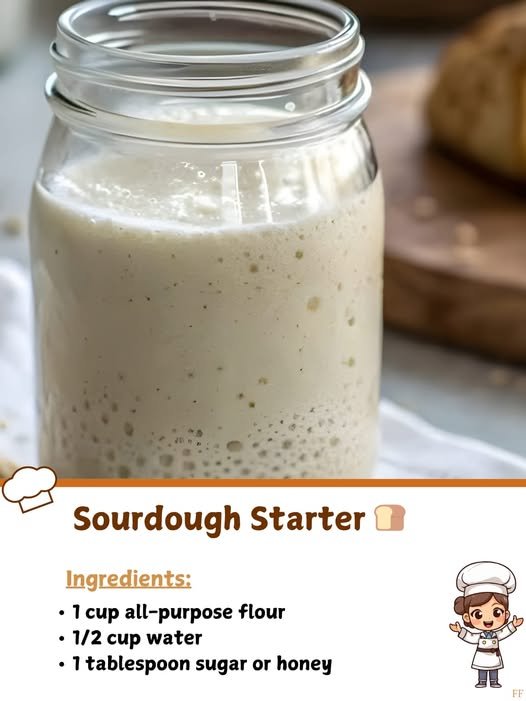

Ingredients
- 1 cup all-purpose flour
- ½ cup water
- 1 tablespoon sugar or honey
Equipment
- Clean glass jar or food-safe container
- Wooden spoon or silicone spatula
- Kitchen scale, optional
- Loose-fitting lid or clean cloth
Before You Begin
Choose a clean jar that is large enough to allow the starter to grow. A jar with plenty of extra space is important because an active starter can expand significantly.
Use room-temperature water rather than very hot water. Very hot water can damage the microorganisms you are trying to cultivate.
If your kitchen is particularly cold, the starter may take longer to develop. A comfortably warm location away from direct sunlight is generally a better environment.
Step 1: Combine the Ingredients
Add 1 cup of all-purpose flour to your clean jar.
Pour in ½ cup of water.
Add 1 tablespoon of sugar or honey.
Using a clean spoon or spatula, stir everything together thoroughly.
The mixture should resemble a thick pancake batter. If it is extremely dry, add a tiny amount of water. If it looks unusually runny, add a little flour.
Scrape down the sides of the jar so the mixture is gathered together.
Step 2: Cover the Jar
Cover the jar loosely.
You can use a lid that is not tightly sealed or another breathable covering that keeps the jar protected while allowing some airflow.
Do not seal an actively fermenting starter in a completely airtight container.
Place the jar somewhere at a comfortable room temperature, away from direct sunlight.
Step 3: Wait for the First Signs of Activity
Leave the mixture undisturbed for approximately 24 hours.
Depending on your kitchen temperature and flour, you may notice tiny bubbles, a slightly expanded mixture, or a pleasantly fermented smell.
You may also see very little activity at first. That does not necessarily mean the starter has failed.
Sourdough starters can develop at different speeds.
Day 2: First Feeding
After approximately 24 hours, check your starter.
If you see bubbles, that is a sign of fermentation. If you do not see much activity, continue with the process.
For a more manageable starter, discard approximately half of the mixture.
Add:
- ½ cup flour
- ¼ cup water
Stir thoroughly.
The consistency should again resemble thick pancake batter.
Cover loosely and return the jar to its warm location.
Day 3: Continue Feeding
By the third day, you may notice more bubbles and a stronger fermented aroma.
Discard approximately half of the starter again.
Add another:
- ½ cup flour
- ¼ cup water
Mix well.
Scrape down the sides of the jar.
Cover loosely and allow it to rest.
At this stage, the starter may begin rising and falling between feedings.
Days 4–7: Build Strength
Continue the feeding process once every 24 hours.
Each day:
- Check the starter.
- Discard approximately half.
- Add flour.
- Add water.
- Stir thoroughly.
- Cover loosely.
- Leave at room temperature.
As the starter becomes stronger, you should notice more regular bubbling and rising.
You may also notice that the starter develops a pleasantly tangy, fermented aroma.
How to Know Your Starter Is Active
A mature starter usually shows several signs of healthy activity.
It should:
- Produce plenty of bubbles.
- Increase noticeably in volume after feeding.
- Have a pleasantly fermented aroma.
- Rise and eventually fall.
- Become lighter and aerated inside.
One useful method is to mark the level of the starter on the outside of the jar after feeding. You can use a rubber band or piece of removable tape.
This makes it easy to see how much the starter rises.
The Float Test
Some bakers use a float test to check whether their starter is ready.
Take a small spoonful of active starter and gently place it into water.
If it floats, it may contain enough trapped gas to be ready for baking.
However, the float test is not a perfect measure by itself. A starter that rises predictably after feeding and shows strong bubbling is a better indication of fermentation activity.
What If My Starter Is Not Bubbling?
Do not panic if your starter is slow.
Several things can affect fermentation speed, including:
- Room temperature
- Type of flour
- Water temperature
- Feeding schedule
- Hydration
- Container size
A cold kitchen can significantly slow down fermentation.
Try keeping the starter somewhere comfortably warm, but avoid placing it directly against a hot appliance or in extreme heat.
What If There Is Liquid on Top?
Sometimes a layer of liquid can appear on the surface of a starter.
This can happen when the starter has been sitting for a while and has used much of its available food.
Stirring it back in and continuing regular feeding may be appropriate if the starter otherwise looks and smells normal.
However, if you see obvious mold or unusual discoloration, discard the starter and begin again with clean equipment.
How to Use Your Starter
Once your starter is reliably active, it can become the foundation for many recipes.
You can use it to make:
- Sourdough bread
- Sourdough pizza
- Sourdough sandwich bread
- Sourdough biscuits
- Sourdough pancakes
- Sourdough waffles
- Sourdough dinner rolls
- Sourdough crackers
- Sourdough muffins
The discarded portion can also be used in recipes designed specifically for sourdough discard.
Feeding a Mature Starter
Once your starter is established, you do not necessarily need to keep feeding it at room temperature every day if you are not baking frequently.
Many home bakers keep their starter refrigerated and feed it regularly according to their baking schedule.
Before baking, the starter generally needs to be brought back to an active state through feeding.
If you bake frequently, keeping it at room temperature and maintaining a regular feeding routine can be convenient.
Helpful Tips
Use the Same Flour Consistently
All-purpose flour works well for this recipe. You can experiment with other flours later, but consistency makes it easier to understand how your starter behaves.
Keep the Jar Clean
Scrape down the sides regularly. Dried starter around the rim can become difficult to clean and can make maintaining the jar more complicated.
Don’t Seal It Tightly
Fermentation produces gas. A loosely covered container allows the starter to release pressure safely.
Be Patient
Every starter develops differently. One may become active in several days, while another may need longer.
Watch the Starter Rather Than the Clock
Instead of relying entirely on a fixed number of days, look for bubbling, rising, and predictable activity.
Troubleshooting
My Starter Smells Sour
A tangy or fermented smell can be normal as the starter develops.
My Starter Is Very Runny
It may contain too much water for the flour being used. Adjust the next feeding slightly so the mixture becomes thick and spoonable.
My Starter Rose and Then Fell
This can actually be a useful sign. It means the starter produced gas and expanded, then consumed available food and declined again.
There Is Mold
If visible mold develops, discard the starter rather than trying to remove only the affected area. Wash the container thoroughly before beginning a new starter.
Final Thoughts
Making a homemade sourdough starter is a wonderful introduction to naturally fermented baking. With just all-purpose flour, water, and a little sugar or honey, you can begin developing a starter that can eventually be used for a wide range of homemade recipes.
The process is not about rushing. Give the starter time to develop, feed it consistently, observe its bubbles and rise, and learn how it behaves in your particular kitchen.
Once your starter becomes active and reliable, you can use it to create everything from rustic sourdough loaves to pizza, pancakes, biscuits, and other baked treats.
The most important thing is patience. Your starter may not look dramatically different during the first few days, but with regular care, it can gradually become an active and useful part of your baking routine.