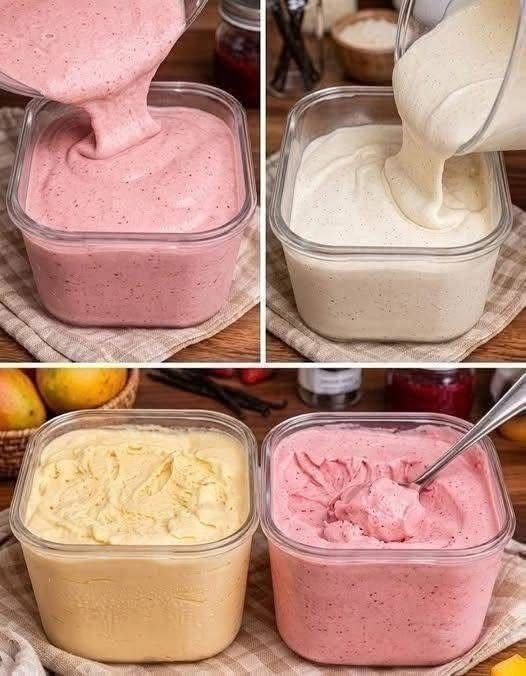

Simple Homemade Ice Cream Recipe
Homemade ice cream is one of those desserts that feels special but is surprisingly easy to make. You do not need an expensive ice cream machine, complicated ingredients, or advanced cooking skills. With a few basic ingredients and some patience, you can make creamy, delicious ice cream at home that tastes far better than you might expect.
This simple homemade ice cream recipe is especially useful when you want a cold and refreshing dessert for your family. It uses everyday ingredients and can easily be customized with chocolate, cookies, fruit, nuts, or other favorite flavors.
Ingredients
For approximately 6–8 servings, you will need:
- 2 cups heavy cream or whipping cream, chilled
- 1 can (about 14 ounces or 397 grams) sweetened condensed milk
- 1 teaspoon vanilla extract
- A small pinch of salt
- Optional: 2–4 tablespoons sugar, depending on how sweet you like your ice cream
- Optional toppings or mix-ins such as chocolate chips, crushed cookies, chopped nuts, fresh fruit, caramel sauce, or chocolate syrup
The beauty of this recipe is its simplicity. Sweetened condensed milk provides sweetness and helps give the ice cream a smooth texture, while whipped cream creates the light, creamy consistency that makes homemade ice cream so enjoyable.
Equipment You Will Need
You do not need an ice cream maker for this recipe. A few basic kitchen tools are enough:
- A large mixing bowl
- An electric hand mixer or stand mixer
- A spatula or large spoon
- A freezer-safe container with a lid
- Measuring cups and spoons
If you do not have an electric mixer, you can technically whip the cream by hand with a whisk, but this will require considerably more effort.
Step 1: Chill the Ingredients
Before you begin, make sure the whipping cream is thoroughly chilled. Cold cream whips much more easily and produces a better texture.
For the best results, place the cream in the refrigerator several hours before making the ice cream. You can also chill the mixing bowl and beaters in the refrigerator or freezer for about 10–15 minutes.
Keeping everything cold helps the cream become thick and fluffy during whipping.
Step 2: Whip the Cream
Pour the chilled heavy cream into a large mixing bowl.
Using an electric mixer, beat the cream on medium to medium-high speed. Continue mixing until soft peaks form. This usually takes several minutes, although the exact time depends on the temperature of the cream and the power of your mixer.
Soft peaks mean that when you lift the beaters, the cream forms a peak that bends or falls slightly.
Be careful not to over-whip the cream. If you continue beating for too long, the cream can become grainy and eventually start turning into butter.
You want the cream to be thick, smooth, and fluffy.
Step 3: Add the Condensed Milk
Once the cream has been whipped, slowly add the sweetened condensed milk.
Add the vanilla extract and a small pinch of salt as well.
The salt might seem unnecessary in a sweet dessert, but a tiny amount can enhance the flavor and balance the sweetness.
Using a spatula, gently fold the condensed milk into the whipped cream. You can also use your mixer briefly on its lowest speed, but folding by hand is usually better because it helps preserve the air that you incorporated into the cream.
Mix until everything is evenly combined.
The mixture should look smooth, creamy, and fluffy.
Step 4: Add Your Favorite Flavor
At this stage, you can keep the ice cream as simple vanilla or turn it into another flavor.
For classic vanilla ice cream, simply leave the mixture as it is.
For chocolate ice cream, add a few tablespoons of unsweetened cocoa powder. You can also add melted and cooled chocolate for a richer flavor.
For cookie ice cream, gently fold in crushed chocolate sandwich cookies, chocolate chip cookies, or your favorite biscuits.
For strawberry ice cream, add finely chopped strawberries or a strawberry puree. If using fresh fruit, make sure it is not excessively watery because too much liquid can create ice crystals.
For mango ice cream, fold in ripe mango puree. This is particularly delicious during mango season.
You can also create a simple chocolate-chip ice cream by adding chocolate chips or chopped chocolate.
Nuts such as almonds, pistachios, walnuts, and pecans can add a pleasant crunch.
Step 5: Transfer the Mixture to a Container
Once your ice cream mixture is ready, transfer it to a clean, freezer-safe container.
A shallow container can be useful because the mixture will freeze more quickly and evenly. However, almost any suitable freezer container will work.
Smooth the surface with a spatula.
If you want to add toppings or layers, this is the time to do it. For example, you can drizzle chocolate syrup over the mixture and gently swirl it with a spoon.
You could also create layers of crushed cookies and ice cream.
Once finished, place the lid securely on the container.
Step 6: Freeze the Ice Cream
Place the container in the freezer.
For the best texture, allow the ice cream to freeze for at least 6 hours. Leaving it overnight is usually even better.
Try not to open the freezer repeatedly while the ice cream is freezing. Frequent temperature changes can encourage ice crystals to form.
Because this is a no-churn recipe, there is no need to remove the ice cream every hour and stir it. The whipped cream helps create a smooth texture without requiring an ice cream machine.
However, if you want to experiment with an even smoother texture, you can stir the mixture once or twice during the first few hours of freezing.
Step 7: Let It Soften Before Serving
Homemade ice cream can become quite firm after spending several hours in the freezer.
When you are ready to serve it, take the container out of the freezer and allow it to sit at room temperature for approximately 5–10 minutes.
This makes scooping much easier.
Use a sturdy ice cream scoop to create neat balls and place them in bowls, cones, or cups.
You can serve the ice cream plain or decorate it with your favorite toppings.
Delicious Topping Ideas
One of the best things about homemade ice cream is that everyone can customize their own serving.
Try topping your ice cream with:
- Chocolate syrup
- Caramel sauce
- Chopped nuts
- Chocolate chips
- Sprinkles
- Crushed cookies
- Fresh strawberries
- Banana slices
- Mango pieces
- Shredded coconut
- Whipped cream
- Chopped chocolate
- Crushed wafers
For a simple dessert, place one or two scoops of vanilla ice cream in a bowl and drizzle chocolate syrup over the top. Add some chopped nuts and a few chocolate chips for an easy homemade sundae.
Tips for Creamy Homemade Ice Cream
Although this recipe is simple, a few small details can make a big difference.
Use Cold Cream
Cold cream is easier to whip and generally produces a better consistency. Keep it refrigerated until you are ready to use it.
Do Not Over-Whip
Whip the cream until it reaches soft or medium peaks. Over-whipping can make the mixture grainy.
Fold Gently
When combining the condensed milk with whipped cream, fold gently. This keeps the mixture airy and helps produce a lighter ice cream.
Use a Freezer-Safe Container
Choose a container designed to withstand freezing temperatures. Make sure it has a tight-fitting lid to protect the ice cream from freezer odors.
Avoid Too Much Liquid
If you add fruit, sauces, or other ingredients, avoid adding excessive amounts of liquid. Too much water can result in an icy texture.
Give It Enough Freezing Time
Do not rush the freezing process. The ice cream needs several hours to become firm enough to scoop properly.
Easy Flavor Variations
Once you have mastered the basic recipe, you can experiment with different flavors.
Chocolate Ice Cream
Add 3–4 tablespoons of unsweetened cocoa powder to the condensed milk before combining it with the whipped cream. For an extra-rich chocolate flavor, add some melted dark or milk chocolate after allowing it to cool slightly.
Strawberry Ice Cream
Puree approximately 1 cup of ripe strawberries and fold them into the ice cream mixture. You can also add small pieces of fresh strawberries for extra texture.
Mango Ice Cream
Use ripe, sweet mangoes and blend the flesh into a smooth puree. Add the puree gradually so that the mixture does not become too watery.
Cookies and Cream
Crush your favorite chocolate sandwich cookies and fold them into the finished ice cream mixture. Reserve a few pieces to sprinkle over the top.
Coffee Ice Cream
Dissolve 1–2 teaspoons of instant coffee in a small amount of warm water. Allow it to cool completely before adding it to the mixture. Adjust the amount according to how strong you want the coffee flavor to be.
Pistachio Ice Cream
Add finely chopped pistachios to the mixture. For a stronger flavor, you can also add a small amount of pistachio paste if available.
How to Store Homemade Ice Cream
Homemade ice cream should be kept in the freezer in a tightly sealed container.
For the best quality, enjoy it within a few weeks. Although it can remain frozen for longer, its texture and flavor may gradually decline.
Always use a clean spoon or scoop when serving. Avoid repeatedly allowing the entire container to melt and refreeze because this can create larger ice crystals and make the ice cream less creamy.
If the ice cream develops a layer of ice on the surface, it may have been exposed to air or temperature changes. Keeping the container tightly covered can help prevent this.
Why Make Ice Cream at Home?
There are many advantages to preparing ice cream at home. First, you can control the ingredients and adjust the flavor according to your preferences. If you love chocolate, you can add more chocolate. If you prefer less sweetness, you can choose mix-ins that balance the sweetness of the condensed milk.
Homemade ice cream is also a fun activity for children and families. Kids can help crush cookies, prepare toppings, or choose different flavors. You can even divide the mixture into smaller containers and make several flavors at once.
It is also a convenient dessert for parties. Prepare the ice cream the day before and keep it frozen until you are ready to serve it.
Common Mistakes to Avoid
One common mistake is using warm cream. Warm cream will not whip as effectively and may result in a thin mixture.
Another mistake is adding hot ingredients directly to the whipped cream. If you are using melted chocolate or another heated ingredient, allow it to cool before adding it.
Adding too much fruit puree can also make the ice cream icy. Use ripe, flavorful fruit and avoid adding unnecessary liquid.
Finally, do not expect the ice cream to be perfectly soft immediately after several hours in the freezer. Homemade ice cream often freezes more firmly than commercial ice cream. Allowing it to sit at room temperature for a few minutes before scooping solves this problem.
Conclusion
Making homemade ice cream does not have to be difficult. With just whipping cream, sweetened condensed milk, vanilla, and a little patience, you can create a creamy and delicious dessert without an ice cream machine.
The basic vanilla version is an excellent starting point, but the recipe can easily be transformed into chocolate, strawberry, mango, cookies and cream, coffee, pistachio, or almost any other flavor you enjoy.
The key is to use cold cream, whip it properly, fold the ingredients gently, and give the ice cream enough time to freeze. Once you understand the basic method, you can experiment with different flavors, toppings, and textures.
Whether you are preparing a dessert for your family, celebrating a special occasion, or simply craving something sweet on a hot day, this simple homemade ice cream recipe is an easy and satisfying choice. With very little preparation, you can enjoy creamy, refreshing ice cream made right in your own kitchen.